Tag: witch

  • DIY Witch Costume: Homemade Witch Costume Tutorial

    DIY Witch Costume: Homemade Witch Costume Tutorial

    Ready to cast spells in style this Halloween? That’s exactly what you’ll be doing in this DIY witch costume! You’ll need a couple of thrift store finds, some tulle and a few other basic materials to whip up this homemade witch costume!

    The Circus and I were chatting about our Halloween costumes the other day. When I showed Grunt a picture in the direction I was thinking about going, his response was, “Oh yea, I forgot how extra you are at Halloween.”

    Halloween is mine and the kid’s jam. Go big or go home.

    Last year, the Circus had three different Halloween costumes and I did two different variations of a witch costume – one more fancied up for our Halloween party and one more laid back for trick or treating.

    DIY Witch Costume

    In my opinion, a good witch costume is always a winner at Halloween. And while there are some great store bought Halloween costumes out there, I feel like a DIY costume always kicks things up a notch or two.

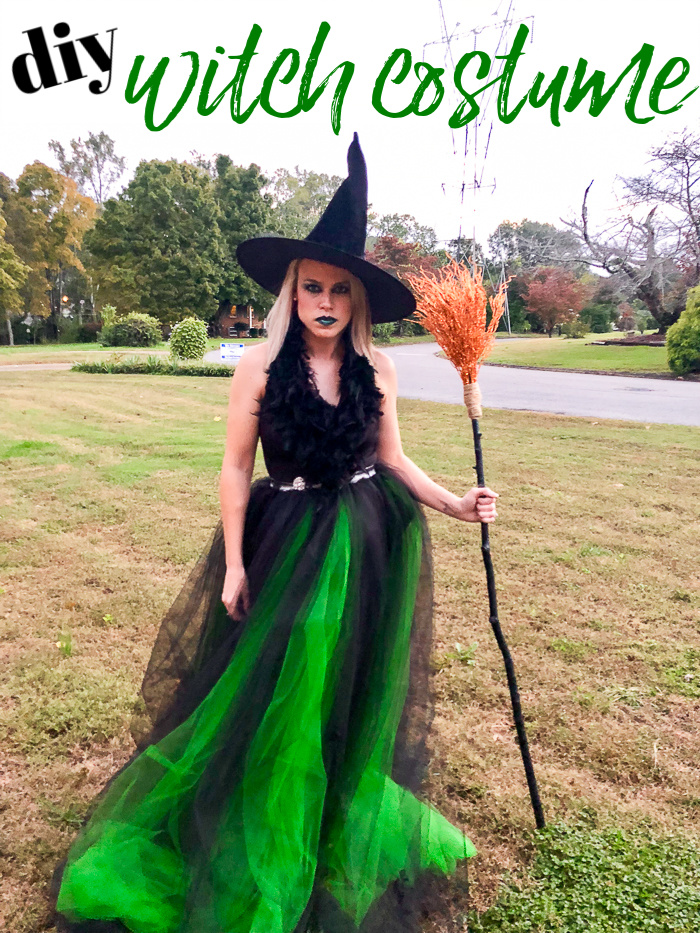
    I put together this halloween costume with a couple of thrift store finds, an easy-to-make tulle skirt and a few other fanciful accessories.

    This post contains affiliate links for your shopping convenience. Click here to read my full disclosure policy.

    DIY Witch Costume for Adults

    I’m going to break this down by top, skirt, makeup and accessories.

    For the Witch’s Top

    You’ll Need:

    • The top portion of a halter-style top two piece formal dress or another black fancy-ish top. (See below for more details and ideas.)
    • Black Feather Boa
    • Safety Pins

    For the top I found a black formal two piece dress with a halter style top.
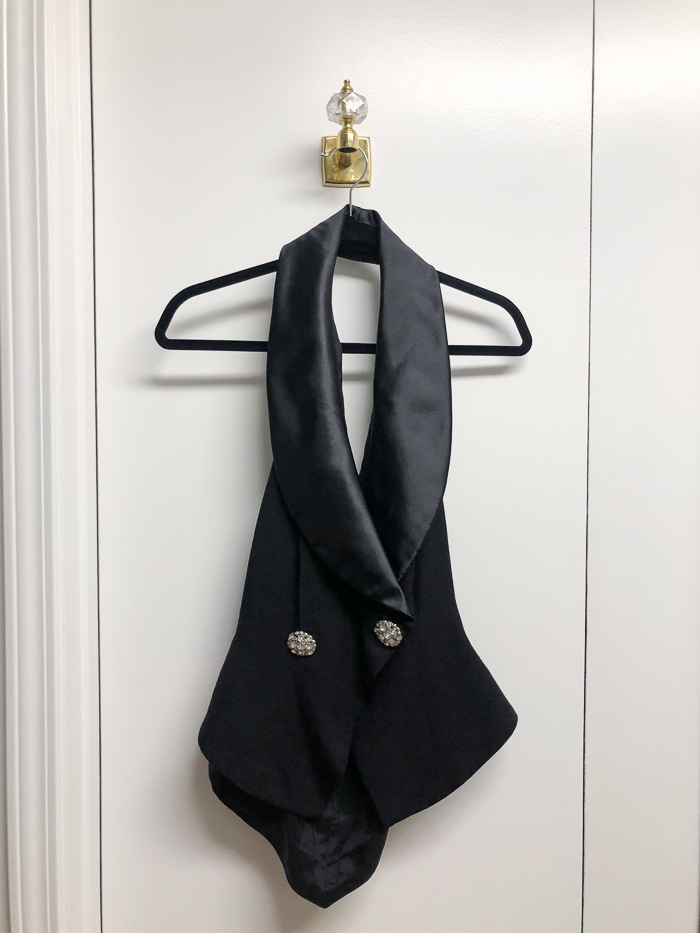
    I see these kind of dresses at thrift stores all the time. If you can’t find one though, just keep your eyes open for a fancier style black top.

    To embellish the top, wrap the feather boa around the halter neck securing with safety pins. If there’s excess boa, then you can snip it off or tuck it into your skirt.

    If you can’t find a halter style top, you could still easily embellish the neckline with a feather boa, just follow along the neckline and secure with safety pins.

    For the Witch’s Skirt

    Folks, I’m not a seamstress. That being said, if I can make this skirt, anyone can.

    You’ll Need:

    • Tulle – lots of it. 😀 I used green and black strips. I had a total of 20 strips that were 48″ long and 58″ wide. You can adjust as needed – more details below.
    • 2 inch Wide Elastic Band that will fit snugly around your waist when sewn together – more details below. You can buy this by the yard at fabric stores.
    • Needle and Black Thread
    • Black Slip – this is the one I used.

    Step 1

    Sew your elastic band together, end to end, to create the waist of your skirt. Hold the band around your waist to determine how big to make it. This isn’t rocket science, you want the band to fit snugly around your waist so your skirt doesn’t fall, but not too tight that your uncomfortable.

    Step 2

    Cut your tulle into strips. I left the width of the tulle alone, I just cut strips that were 48″ long. You can cut these strips longer or shorter depending on your height. For reference, I’m about 5′ 3″. Again, I did twenty strips total – more black than green. I wanted the green to pop against the black, thus why I did fewer of those.

    Step 3

    Turn your sewn-together elastic band inside out.

    Take a tulle strip and gather it together at the top, then sew it to the band.

    This doesn’t have to be perfect. It doesn’t have to be pretty. When you’re done sewing all the strips to the inside of the band, you’re going to flip it right side out and no one is ever going to see your elementary sewing skills.

    Continue sewing tulle strips to the skirt until your satisfied with how it looks.

    Step 4

    This really isn’t a step, but it’s an important part of the outfit, unless you’re planning to moon someone.

    When you go to wear the skirt, be sure to wear a black slip under it. Obviously, the tulle strips don’t form a solid covering around your rear end, so the slip takes care of this.

    For the Witch’s Makeup

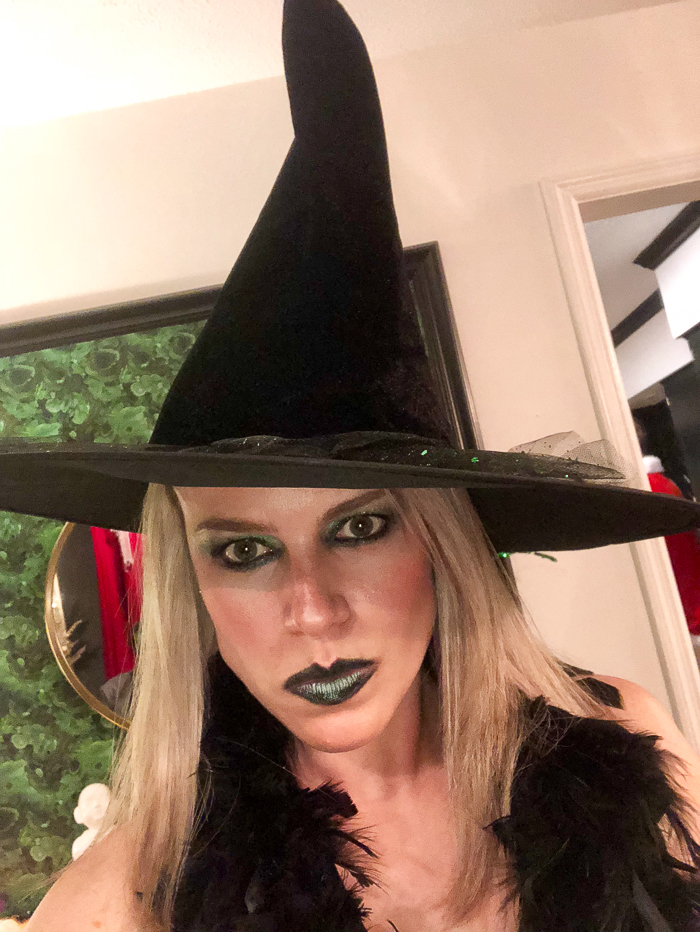
    I opted to go with greens and black for my makeup to keep with the green and black in my skirt. You can of course go with whatever colors you’d like. For my more casual take on this costume, I did purples and greens.

    Full disclosure: I am not a makeup guru, folks. I’m not even that good with it. I have no idea how to contour and all that other shit. So trust me, this is not complicated. I just played around with mine and added/blended/wiped away, etc., until it looked good. I did find that more is definitely more with this look though – it is Halloween, right?

    To get a look similar to mine, you’ll need:

    • Your Usual Primer, Foundation, Concealer, etc.
    • Eyeshadow Primer – this is the one I always use.
    • Shimmery Green Eyeshadow – I used this one in Jade.
    • Shimmery Black Eyeshadow – I used this one in Black Knight.
    • Eyebrow Mascara – I used this one in Brunette.
    • Mascara – your usual. This one is my new favorite because I have zero smudging with it.
    • Blush – I just used my usual blush, which is this one in Pink.
    • Highlighter – I used this one and it’s my all-the-time favorite.
    • Black Cream Lipstick – I used this one in Go Rogue.
    • Black Lipliner – I used this one.
    • Green Cream Lipstick – I used this one in Out of This World.
    Step 1

    Apply your primers, concealers and foundation as usual.

    Step 2

    Apply eyeshadow primer and let dry. Apply black eyeshadow on your eyelid. Come back with green eyeshadow around the edges of your eyelid and onto your brow bone blending out. Add more black or green to create more depth/color or to however you like it.

    Line your eyes, top and bottom, with heavy black eyeliner. Lightly smudge out the eyeliner using the black eyeshadow, then go lightly over the eyeliner again with a little of the green eyeshadow.

    Apply eyebrow mascara. Apply a couple coats of lash mascara. You’ve got lots of eyeshadow going on here, so don’t skimp on the layers of eyebrow and eyelash mascara, folks.

    Step 3

    Apply blush

    Step 4

    Apply highlighter along the bridge of your nose, above your Cupid’s bow, the center of your forehead, your cheekbones and chin. I just used my finger to do this as it made it a bit more defined than using a brush.

    Step 5

    Apply black lipliner heavily around your lips.

    Apply black lipstick all over your lips, but more heavily along the edges.

    In the center of your lips, apply the green lipstick. Blend as needed. You’re going for a fading of black to green look here.

    For the Witch’s Accessories

    You’ll need:

    • A witch’s hat of course!
    • A broom
    DIY Witch Costume

    I just went with a classic witch hat for this costume. You can find these all over the place during Halloween.

    For my broom, I used one of the DIY witch’s brooms I made, which honestly, I love more than any other store bought witch brooms I’ve found.

    That’s it! Pretty basic stuff, but packs a serious punch when put together!

    And what’s on tap for this Halloween? You’ll just have to wait and see….it does include a fur coat though, and black and white hair. 😉

    Have you made your own witch costume before?

    Ready to get in the Halloween spirit? Be sure to see these then…

    Dollar Tree Skulls Candleholder – one of my favorite Halloween decorations and it uses stuff from the Dollar Tree!

    Free Printable Spell Book Cover – every witch needs her a spell book, right?!

    DIY Skull Drink Stirrers – and every witch needs a drink stirrer topped with the skull of those poor unfortunate souls… haha!

    Easily come back to this costume tutorial later by pinning the image below!
    Keep up with our Halloween shenanigans on social media:
    Facebook | Instagram | Pinterest | Twitter

  • Glittery DIY Witch Broom

    Glittery DIY Witch Broom

    Learn how to make a witches broom using items from the Dollar Tree and your own yard! It’s so simple to make this sparkly DIY witch broom that you’ll only be sorry you didn’t make one sooner!

    This year for Halloween, I’m going to be a (not-so-basic) witch! Personally, I don’t think dressing up as a witch for Halloween ever goes out of style and I’m really excited to put my own personal spin on it this year. The Circus says she’s going to be my black cat, but then some days, she says she’ll be a witch with me and then some days, she’s just going to be a dog. So who knows what she will actually end up being?

    Every witch of course, needs a broom. If you ask me or the Circus, we’ll tell you that we prefer brooms of the glittery and sparkly variety.

    DIY Witch Broom for Halloween

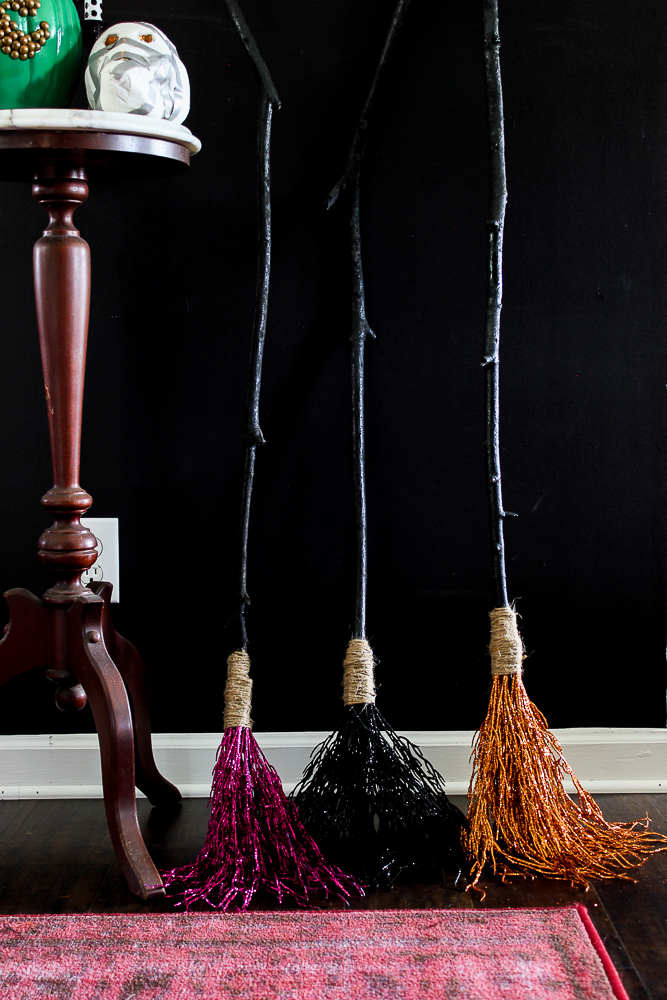
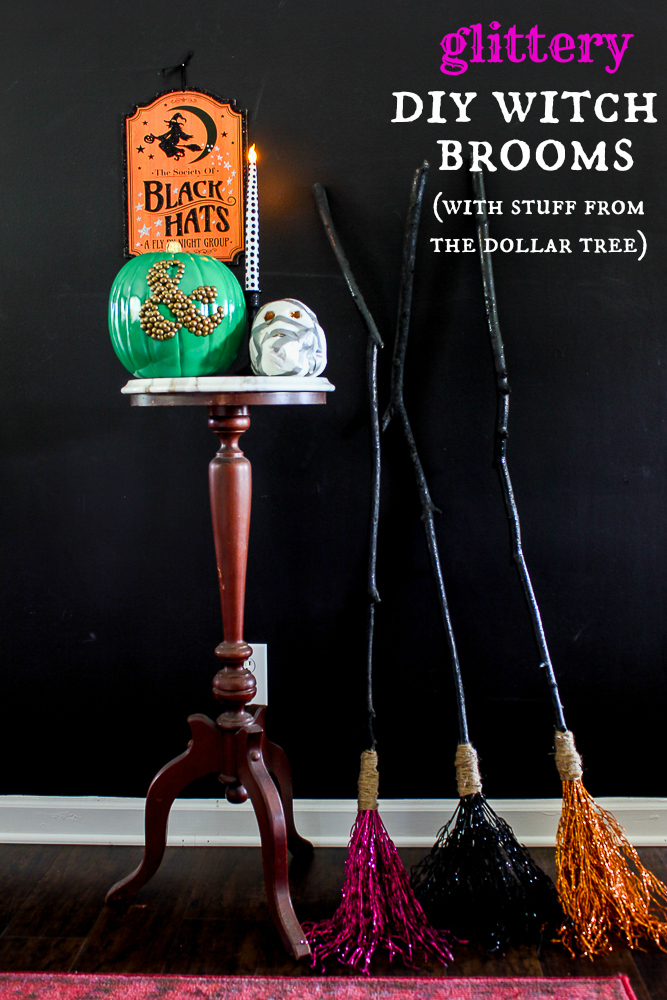
    And glittery brooms, we have! I made these using supplies from my own backyard and The Dollar Tree. And you know what – I think these actually look better than a store bought glittery broom I bought a couple years back! Grunt agrees, so I’ll just go ahead and say it’s fact. 😉

    Here’s how you can whip up your own glittery, sparkly DIY witch broom this Halloween!

    How to Make a Witches Broom

    This post contains affiliate links for your shopping convenience. Click here to read my full disclosure policy.

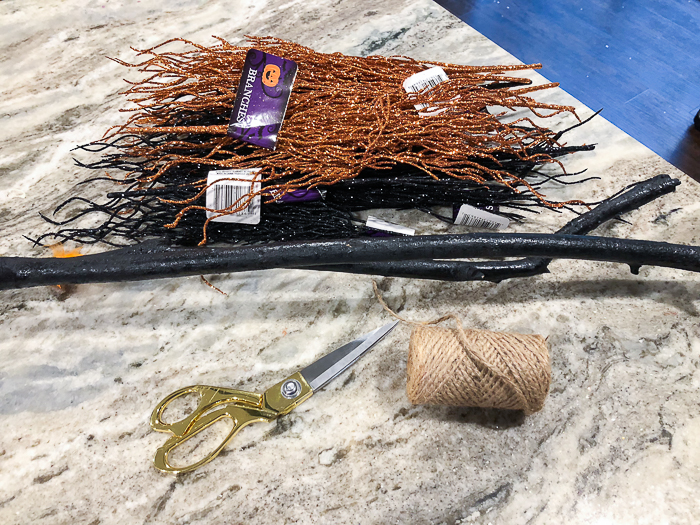
    Supplies & Tools Needed Per Broom: 

    How to Make a Witches Broom for Halloween

    • 1 tree branch from your yard roughly four feet long and about 1 inch in diameter
    • Black Spray Paint
    • 5-7 Glittery Branches in the color of your choice
    • Jute Twine
    • Hot Glue Gun
    • Scissors

    Steps

    Step 1

    Remove all the smaller twigs and leaves from your large tree branch. Cut to size if needed. Spray paint the tree branch black.

    Step 2

    After the branch has dried, run a bead of hot glue on one glittery branch stem and glue it onto your tree branch near the bottom.

    Make a Witches Broom with stuff from your yard and the Dollar Tree.

    Place the glittery branch so that where it breaks off into smaller branches and fans out is right near where the real tree branch ends. Hold the glittery branch in place until the glue dries.

    Step 3

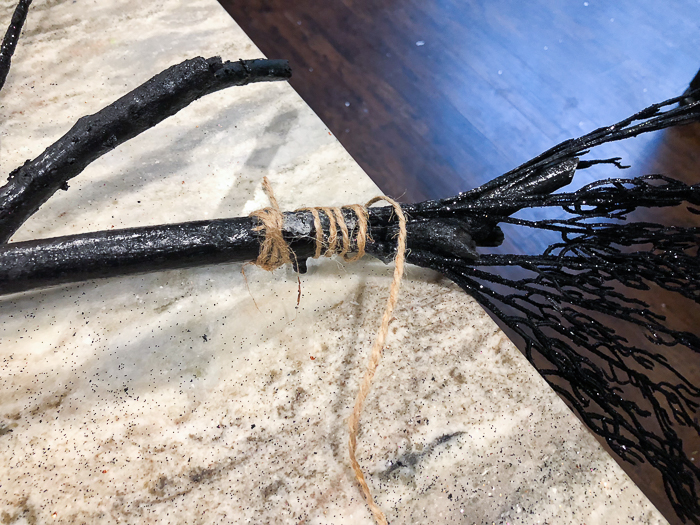
    Wrap twine tightly around where the two branches are glued together a few times.

    DIY Halloween Witch Broom using Dollar Tree Items

    Step 4

    Repeat steps 2-3 until you have covered your tree branch end with enough glittery branches for your liking. I used about 5-7 glittery branches per actual tree branch.

    Step 5

    Once you have put all the glittery branches you want on your tree branch, wrap more twine around where the tree branch and glittery branches meet. Cover any spots of glitter or black that may be coming through where the glittery branches are glued.

    Sparkly DIY Witch Broom for Halloween Decor

    Cut the twine when you are finishing wrapping and hot glue the end tightly in place.

    Fair warning – these do shed glitter, especially as you are putting them together. A little glitter never hurt anyone though. 😉

    How to Make a Sparkly Witches Broom for Halloween Decor

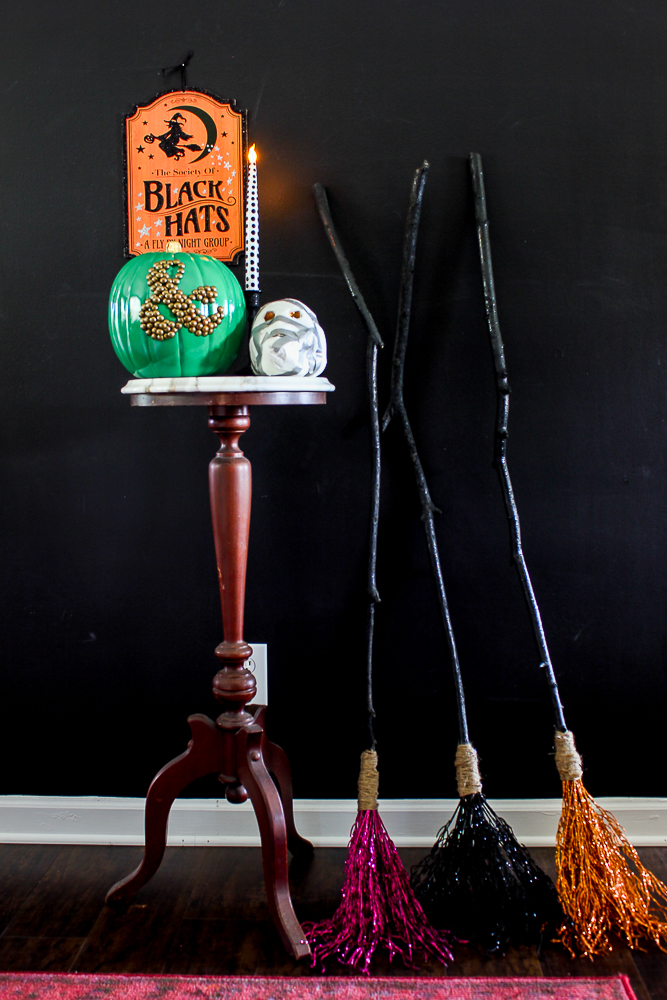
    The Circus has already staked claim on the pinky-purple one if she’s a witch, so I’ll be flying on the black or orange one. 😉

    Update: You can see me sporting my broom alongside my witch costume here!

    Any spot for a DIY halloween witch broom in your Halloween decor?

    Want more DIY halloween projects on a budget? You’re in the right place…

    DIY Skull Sconce – another awesome Halloween decoration made from Dollar Tree items!

    Easy DIY Halloween Decorations for $10 or Less – a collection of all my fave Halloween decorations that didn’t break the bank! Don’t miss these!

    Be sure to grab this free printable Spell Book cover too! No Halloween decor is complete without it!

    Want to come back to this one later? Just pin the image below!

    Glittery DIY Witch Brooms for Halloween

  • Simple Chevron Witch Hat and Pumpkin

    Simple Chevron Witch Hat and Pumpkin

    Remember that fabulous navy and white chevron tray I made?

    I knew you would.

    It was just so simple and fabulous that I couldn’t keep myself from putting some chevron love into my Halloween decor.

    Chevron Witch Hat & Pumpkin {rainonatinroof.com} #frogtape #chevron #witchYep, I made a chevron witch hat with my beloved FrogTape Chevron Shape Tape.

    Disclosure: This post is sponsored by FrogTape, but y’all know how I roll, all opinions are 100% mine. This post contains affiliate links for your shopping convenience. Click here to read my full disclosure policy.

    Just like my chevron tray, this was so simple! I started with this cardboard witch’s hat I picked up at a local craft store for a few bucks.

    Chevron Witch Hat & Pumpkin {rainonatinroof.com} #frogtape #chevron #witchIt was screaming for chevron and glitter, don’t you think?

    Before putting on any shape tape, I spray painted the entire hat glossy black, then pulled out my chevron shape tape and got to work.

    Chevron Witch Hat & Pumpkin {rainonatinroof.com} #frogtape #chevron #witch

    Chevron Witch Hat & Pumpkin {rainonatinroof.com} #frogtape #chevron #witchTo get the round, contoured cut on the tape where the cone meets the hat brim, I cut lightly with an X-Acto blade. And just like with my chevron tray, I used a small piece of the tape to measure the distance between where I applied the tape. After all the tape was where I wanted it, I made sure to press it down hard and remove any air bubbles, so there was a secure seal. Shape Tape is just like regular FrogTape, it has the PaintBlock® Technology that forms a barrier to keep the paint from bleeding!

    This is what I came up with:

    Chevron Witch Hat & Pumpkin {rainonatinroof.com} #frogtape #chevron #witchI apologize for the blurriness, but you get the idea.

    I took it out to the garage and gave it coat of orange spray paint. Right after I gave it a coat of spray paint, I threw some orange glitter (throw some glitter, make it rain!) on it, to accentuate that fabulous chevron effect.

    Chevron Witch Hat & Pumpkin {rainonatinroof.com} #frogtape #chevron #witchSo now my garage floor sports not only green, navy, white and orange colors, but glitter as well.

    I let it sit for 5 minutes or so and then pulled off the tape.

    The base looked fabulous, however, I didn’t like how I had positioned the shape tape on the cone, so I taped off the base and sprayed the entire cone orange and added glitter to it.

    And then, I had this fabulous end result:

    Chevron Witch Hat & Pumpkin {rainonatinroof.com} #frogtape #chevron #witchGrunt Labor came home and asked if I had really made that.

    Oh, ye, of little faith. He was pretty impressed. I don’t know if he has figured out about the shape tape yet and just how easy that makes projects. Maybe I won’t tell him just yet….It’s good to be queen.

    Chevron Witch Hat & Pumpkin {rainonatinroof.com} #frogtape #chevron #witchThe hat is the perfect topper to my upcycled skull, which I’ll be telling you about next week.

    And because I love me some chevron so much, I just had to do a chevron pumpkin:

    Chevron Witch Hat & Pumpkin {rainonatinroof.com} #frogtape #chevron #witchBeware, I still have some chevron shape tape left, there may be more chevron-ness in the future!

    Watch out, world.

    Need more Halloween decorating ideas?

    Easy DIY Halloween Decorations – a roundup of some of my favorite Halloween decor!

    Glittery DIY Witch Brooms – to make these, all you’ll need is something from your yard and a few things from The Dollar Tree!

    Free Printable Spell Book Cover and Potion Labels – Turn any book into a spell book!

    DIY Skull Drink Stirrers – these will take all of five minutes to make and are perfect for parties!

    You know you don’t wanna miss any of this crazy.

    Sign up to get my posts delivered to your inbox here. 

    Stalk Me Here:

    Pinterest / Facebook / Twitter / Instagram

    SaveSave