Tag: painting tips

  • Prepping Furniture to Paint: When to Sand, When to Degloss, and When to Prime

    Prepping Furniture to Paint: When to Sand, When to Degloss, and When to Prime

    Not sure if you should sand first before painting that table? Could you skip the sanding? Maybe just degloss instead? Or maybe prime? This guide to prepping furniture to paint should answer all those questions and more…

    I will be the first to say that not every piece of furniture I’ve ever painted has turned out so well. There have been pieces where the paint just peeled off, where the old finish bled through or where the paint color decision wasn’t exactly my best.

    That kind of stuff happens. I don’t have a PhD in furniture painting, but I have learned from my mistakes. With the exception of the poor paint color decisions, the root of the problem often stemmed from not prepping the furniture properly before painting it.

    While there are some pieces where you can just slap the paint right on there without doing diddly squat, there are some pieces that require a bit more prep work. So, here are my tips on prepping furniture for painting – when you should sand it, when you should degloss it, and when you should prime it.

    Prepping Furniture: When to Sand, When to Degloss and When to Prime

    This post contains affiliate links for your shopping convenience. Click here to read my full disclosure policy.

    Do you have to sand before painting?

    I know. Sanding furniture can be a pain in the butt and messy. There are times you can skip it, but sometimes not so much.

    Do you have to sand before painting - sanding wood before painting it.

    If the finish of the piece you are painting is damaged or chipping in any way, then always sand first. If you try to paint over that, then your new paint job will start chipping off almost as soon as you paint it on there.

    If the piece you are painting has any rough spots, like let’s say you’re painting new wood, then you need to sand those spots smooth before painting as well.

    Sanding Furniture to Paint

    What to Sand With

    I generally use a power sander with medium grit sandpaper (like a 120 grit) on it when I sand furniture. You can also use just regular medium grit sandpaper without a power sander as well, it will just take you a good bit longer. I have a tutorial here about using power sanders if you need it.

    After sanding furniture, I usually give it a go-over with my Shop Vac and then follow-up with a tack cloth. If there isn’t that much dust, then I just use a tack cloth. Either way – don’t skip the tack cloth! It keeps you from having dirt and dust bumps in your finish.

    Got holes, gouges, dents or dings?

    If you’ve got any holes, gouges, dents or dings in the piece you are painting and want to smooth those out, then this is the time to do it. Fill them with wood filler and then sand smooth.

    How to Paint Furniture Without Sanding or Priming

    When You Can Just Degloss Furniture

    There are times when you can skip sanding furniture. However, before painting it, you might need to degloss it.

    how to paint furniture without sanding by using a stain and paint deglosser.

    If the piece you are painting has any sort of finish on it that is shiny, slick, glossy, semi-glossy, even satin, then you need to degloss it before painting it.

    What is deglosser?

    Exactly what it says it is. 🙂 It’s a liquid that removes the glossy finish from painted or stained surfaces.

    Deglosser vs. Sanding

    Now, if you already sanded it, you probably already removed that shine, so don’t worry about de-glossing it. You should always sand the piece if you have uneven surfaces as well. A paint deglosser can be used when the piece is in good condition and you only need to remove that shiny finish.

    How to Degloss Paint

    My go-to deglosser is Ready.

    Using paint deglosser to remove the shine.

    You just spray it all over your piece of furniture, let it sit for a few minutes and then wipe it clean with a cloth or paper towels. Ready will remove the shine from the finish. If you have something that has a really thick shiny topcoat, it make take a few rounds of Ready. I’ve also used Klean-Strip Sander Deglosser and it worked well too, the application is just a little messier.

    When You Should Prime Furniture

    A lot of times, if you had to sand your piece of furniture or degloss it, you usually won’t need a primer.  There are two cases though where I always tend to use a primer before applying my actual paint:

    1. When I’m painting something a much lighter color than what it already is. 

    Let’s say I’m painting something white that started out black. I can just go on and paint tons of coats of white on it until I get all the black covered, or I could start with a coat of primer to reduce the overall number of coats of the white paint. Make sense?

    2. When I’m painting over a stain or wood with red undertones. 

    Some stains and woods such as mahogany, have lots of red undertones. I’ve found that these red undertones can easily bleed through your paint finish – especially if you are painting the piece a lighter color rather than a darker color. I suggest a minimum of one coat of primer to keep those red colors from bleeding through.

    Of course, if you have other stains on your furniture that you are afraid may bleed through, go ahead and give those spots at least a coat of primer. Primer is also good if you have a musty or stinky piece of furniture. It helps to kill those smells.

    Also, if you’re painting raw wood that’s never been painted or stained before, giving it a coat of primer before painting it helps to reduce your number of coats of paint. Otherwise, the wood will soak up a lot of your paint color.

    Best Primer for Furniture

    You can find different primers at your local home improvement store. I generally use Kilz primer or Zinnser primer. You’ll apply just as you would your paint – with a roller and brush or you can use it in a paint sprayer. I’ve got a tutorial here for using a paint sprayer when priming and painting furniture if you need it.

    When You Can Skip Sanding, Deglossing and Priming

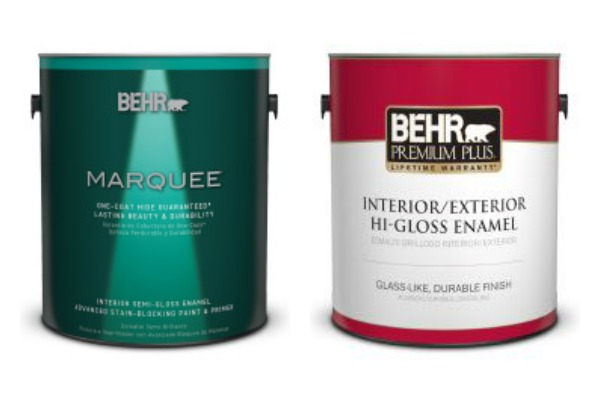
    There will be times that you can skip all these things. If the finish on your furniture isn’t damaged or chipping, it’s flat not shiny and you aren’t painting it a drastically different color, then you may be able to just go ahead and start painting. Before painting though, do make sure the piece is clean. You can wipe it down with a wet cloth to do this. Follow up with a tack cloth to pick up any bits of dust or dirt your cloth might have missed. If you are skipping sanding, deglossing and priming, then I do suggest using a paint that already has a built-in primer such as Velvet Finishes, Behr Marquee, or Behr Premium Plus just for good measure. There are also other paints out there that have this (I think chalk based paints have it), but I’m not very familiar with those.

    Do you have any tips for prepping furniture or to make it easier?

    Perfecting your furniture painting skills? You might want to see these too then…

    What kind of paint do I use on that? – The ultimate guide to all types of paints and what kind of furniture to use them on.

    Furniture Painting 101: Topcoats and When to Use Them – ever wondered if you should use a topcoat on painted pieces and if so, what kind? Here’s your answer…

    Best Paint for Cabinets – All the paints I’ve used on cabinetry and what I think is the best.

    FAQ: Painting Furniture – All the FAQ I get about painting in one place.

    Want to remember these furniture prepping tips for later? Just pin the image below!

    A complete guide to prepping furniture to paint to ensure a long-lasting finish. Tells you when to sand, when to degloss and when to prime.
    blog-signature-summer-15

    SaveSaveSaveSaveSaveSaveSaveSave

  • How to Paint Trim and Doors | Painting 101

    How to Paint Trim and Doors | Painting 101

    Have a lot of trim and interior door painting to do? This guide will walk you step-by-step through the entire process for how to paint trim and doors. We’ll cover what kind of paint to use on trim and doors, the tools you’ll need and what to tackle first.

    Some painting questions I’ve been asked more recently pertain to painting trim and doors – what kind of paint to use on them, how to patch holes, etc.

    In the past 13 years, I have painted more trim and doors than I want to think about. Like three full houses of trim and doors worth. It makes me a little sick just thinking about it. In my early days of painting trim, I actually thought that just slapping the paint on there would magically fill any nail holes in the trim.

    I was an idiot.

    Needless to say, paint does not magically fill those nail holes.

    Here’s what I’ve learned over the years about painting trim and doors. Hopefully, you can learn from my stupidity and save yourselves a few tired arms.

    This post contains affiliate links for your shopping convenience. Click here to read my full disclosure policy.

    Best Paint for Trim and Doors and Tools

    Interior Door and Trim Paint

    First off, let’s talk about what kind of paint to use on trim and doors. Do not, I repeat, do not use flat or eggshell paint on trim or doors. Especially not flat. Guess who made another idiotic move in her early days of painting and used flat on trim. This girl right here. Big mistake. Flat and eggshell paints don’t clean up as easily as semi-gloss and gloss sheens do. If you get dirt and grime on flat paint, you might as well go on and get your paint brush out to paint over it. With semi-gloss and gloss sheens, you can grab a wet cloth and usually wipe away any dirt or grime.

    How to Paint Trim and Doors: Best Paint for Trim and Doors

    I’ve used four different colors on doors and trim: Behr’s standard semi-gloss white that you just pick up right off the shelf, Behr’s Bit of Sugar (a white-white), Behr’s Limousine Leather (black) and Crumb Cookie by Valspar (more of a creamy white). The Bit of Sugar and Limousine Leather were used in various places throughout the 70’s Landing Pad and the Crumb Cookie was used in the Beloved Foreclosure, if you want to see those colors in action.

    Brushes and Rollers

    When it comes to painting tools, such as brushes and rollers, this is not the time to buy the cheapest one you can find. You don’t want to end up with trim and doors that sport fuzz from the roller and hairs from the brush. If you buy the cheap ones, that is exactly what you will get.

    How to Paint Trim and Doors: Always use a good paintbrush.

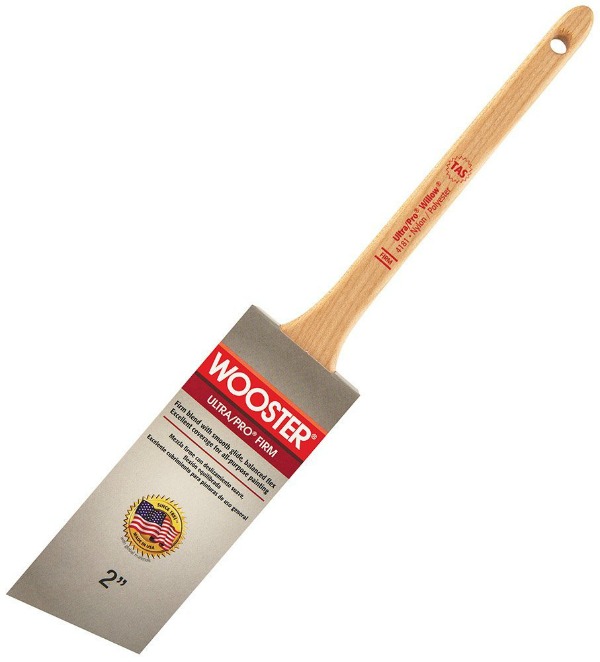
    During all the painting of the 70’s Landing Pad, I found that my favorite brush for painting trim and edging in along walls as well was an angled 2″ Wooster paintbrush. Purdy is another good paintbrush brand as well.

    How to Paint Trim and Doors: Use good rollers.

    As far as your paint roller covers go, you’re probably going to want a smaller sized roller for painting doors (I’ve found that for the most part using a brush is easier than using a roller on trim). My personal pick for those smaller sized roller covers are the Purdy brand ones. As far as the actual roller frame, just about any of those will work no matter the brand. Just choose one that feels good in your hand and fits the size of your roller cover.

    Paint Trays and Pails

    A paint tray is a paint tray. Unless you just have a certain preference, this is where you can usually buy the cheapest one. One little gem that I have found very helpful when painting trim though is the Handy Paint Pail. It has a nice little handle that easily fits over your hand and also a magnet inside the pail so that you don’t lose your brush.

    Wood Filler and/or Spackling

    If you have any holes to fill in your trim or doors, you will want to fill those before painting. I’ll go over how to do that in just a minute, but in terms of what to buy, you can either go with a wood filler or spackling. Now, I used to be a wood filler girl for any holes in woodwork that needed to be filled. However, a contractor who did some work for us suggested I try using spackling instead, which is used to fill holes in drywall.

    How to Paint Trim and Doors: Use spackling to fill holes.

    I tried spackling once and was sold. It’s much easier to use than wood filler and often doesn’t even require sanding.

    P.S. Isn’t spackling like a super funny word? Who came up with that one? 

    Caulk

    If you have any gaps between the wall and trim, you’ll want to fill those gaps with caulk to get a finished look. For this you’ll need caulk and a caulk gun. For caulk, I like to use DAP’s Premium Molding and Trim Sealant. You can use a regular caulk as well, but it will be more likely to crack over time. A basic caulk gun will be just fine.

    Tape and Dropcloths

    Once more, don’t buy just cheap masking tape to tape off the walls and floor alongside your doors and trim. There really is a difference in tape. Masking tape isn’t made to seal out paint, therefore you are bound to get some paint bleed. Some tapes may also not be made to go on walls, therefore you could risk pulling paint off your walls. Always use an actual painter’s tape.

    How to Paint Trim and Doors: Use a real painter's tape, not masking tape.

    I use FrogTape for all my taping off on walls and floors. I also use it to tape off trim when I’m painting walls. If you are applying tape to a freshly painted wall, then use their Delicate Surface version which is made specifically for newly painted surfaces. Use their Multi-Surface tape for cured painted surfaces and if you have textured walls, they have a textured surface tape you can use for that.

    Make sure you also pick up a drop cloth to put over the floor in the area you will be painting as well.

    How to Paint Trim and Doors

    Do I paint trim or walls first?

    If both your trim and walls need to be painted, then you might be wondering what you should paint first – the trim or the walls. For me personally, I find it best to paint the trim first, then the walls. Most people prefer to paint their trim white and oftentimes, your wall color is not white and usually darker than white. So, if you accidentally get your wall color on your trim, it’s going to take more coats of white trim paint to cover it. For this reason, I paint my trim first, let it fully cure for at least 24 hours, tape it off, then paint my walls.

    Prep

    Before you can actually paint your trim and doors, you’ll need to prep it.

    Fill Holes

    The first thing you will want to do is fill holes with either the wood putty I noted above or the spackling. My personal preference is the spackling.

    How to Paint Trim and Doors: Fill nail holes with spackling.

    To fill the holes, just take a bit of spackling on your index finger, gently push it into the hole, then rub your finger back and forth gently over the hole to smooth out the spackling. If you smooth it out enough with your finger, you most likely won’t have to sand any of the spackling after it dries. Let the spackling dry (it’ll take less than an hour probably unless you had some big holes to fill), then look at it to determine if you need to sand any to make it smooth or if you need another coat of spackling. Most smaller holes only require one coat of spackling. If you need another coat, just repeat the steps above. If you have to sand it smooth, use a fine grit sandpaper.

    Caulk

    If you have any gaps between the wall and your trim, then caulk those gaps with your caulk and caulk gun. Apply a small, but even amount of pressure on the gun and then use your finger to smooth the caulk out.

    How to Paint Trim and Doors: Caulk any gaps.

    Tape

    After the caulk has dried, tape off around any walls or flooring that the trim is attached to. Be sure to run your finger or fingernail firmly along the edges of the tape to seal it and prevent paint bleed.

    Finally, lay a drop cloth down in the area where you will be painting.

    Painting Interior Doors and Trim

    Brush first.

    Anytime you’re painting something, a general rule of thumb is to brush all the places that need to be painted with the paintbrush first, rather than rolling first.

    I’ve found that trim such as baseboards and molding around doors usually just need to be brushed anyway and not rolled. Don’t go back and forth with your brush, make long strokes and as soon as you see your brush is running out of paint, get more on it. By making long strokes rather than going back and forth, you will hopefully only have to do 1-2 coats.

    If you are painting doors that are not flat, then brush the detailed places on the door first, then come back with the roller for the flat places.

    How to Paint Interior Doors

    With my front door, I used a paintbrush on all the trim/detail work on the door and then used a roller on the flat parts.

    Roll second.

    After using the paint and paintbrush as needed, go back over the flat or smooth areas of your trim or doors with the roller. Once more, as soon as you see your roller starting to run out of paint, load it back up.

    All the interior bathroom, bedroom and closet doors in our house are flat, so I was able to completely roll them, with the exception of using the brush around the doorknobs and hinges.

    Remove the tape.

    As soon as you have rolled or brushed on your final coat of paint, remove the painter’s tape. Pull it off slowly at a 45 degree angle. If you let the paint dry before removing the tape, you have two options:

    1. Go back over the spots right where the tape is with a little more paint and the paintbrush, then remove the tape immediately.
    2. Use a utility knife to score along the tape and paint, then pull the tape up.

    Whew, that was a lot! I don’t think I realized how much actually goes into painting trim and doors. I’m off to drink a cheap beer – leave your tips and questions in the comments and I’ll be sure to answer them!

    You might find these other painting tips helpful too:

    Types of Paint to Use on Cabinets – I’ve painted cabinets five different times and this is what I’ve learned.

    What kind of paint do I use on that? – A guide to what kind of paint you can use on various types of surfaces.

    Topcoats and When to Use Them – Every kind of topcoat and when you need to use them.

    My Best Tips and Tricks for Painting Furniture – All my tips in one place.

    Want to remember these painting tips for later? Just pin the image below:

    A step-by-step guide for how to paint trim and doors including what kind of paint to use, what the best tools are and how to get a professional paint job.
    blog-signature-summer-15

    SaveSave