I love a great cowhide rug, but not the price tag that comes with them. I found a solution though with this faux cowhide rug I made for only $15. All you’ll need is some faux cowhide fabric and a few other things to make your own!
I have been lusting after a cowhide rug for quite some time. The cowhide lampshade I made just wasn’t enough. I needed more.
Honestly, I don’t know why I don’t already have one. As a girl who has spent the better part of her life around cows, how in the world I don’t already have my very own cowhide is beyond me.
I have talked with my uncle about this problem, who is a cattle farmer. He has promised me that the next time a cow goes to the slaughterhouse, he will have them save the hide and we will tan it for a rug.
Now that the whole world knows of his promise, I feel he must carry through on it. Don’t you think so?
Talk about a great DIY post – tanning your own cow hide – that should be interesting.
So, dear uncle, if you are reading this post, you are not off the hook just because I made a DIY version.
For now though, this faux cow rug will have to suffice.

This post contains affiliate links for your shopping convenience. Click here to read my full disclosure policy.
Fake Cowhide Rug Tutorial
The tutorials I have seen for DIY any-type-of-hide rugs have required painting on the pattern of the hide.
People, I can paint a wall, a piece of furniture, or faux moldings like nobody’s business.
Freehand the pattern on a hide? Houston, we have a problem.
So, when I had fabric left over from my cowhide lampshade, I saw the sign….. and it opened up my eyes.
Did you catch that Ace of Base reference?
I didn’t have a large piece of fabric left over, so I opted for a small version of a cowhide rug. However, you can make your rug any size you wish – just buy enough cow print fabric to do so.
Supplies & Materials Needed:
- Faux Cowhide Fabric – I used this one.
- Pencil
- Scissors
- Polycrylic
Steps
Step 1
Lay out your fabric, animal printed side facing down.

For reference, my fabric was 62 inches x 59.5 inches. Again though, you can go as big as the fabric will let you.
Step 2
Pull up a real cowhide rug that you like online (I just did a Google search for one). Use the photo from online to sketch out the shape on your fabric – be sure to do this on the back! I would suggest doing this with a pencil, a real pencil, not a mechanical pencil. I didn’t have a real pencil on hand, only a mechanical pencil and that didn’t work, so I used a black marker.

It’s really not rocket science, folks. This isn’t hard at all and since you’re sketching on the back of the faux cow hide, there’s room for error.
Step 3
Once you’ve got it all sketched out, cut it out with sharp scissors.

Step 4
If you plan on putting this in a low traffic area, you could flip it over and stop right here.
But, if you plan on putting it in a higher traffic area, you want to protect the top of the rug from dirt and easily tearing. To protect mine, I flipped it cow print side up, stuck cardboard gift boxes under it, and rolled on a couple coats of Polycrylic.
I let it dry for a couple of days, then put it in my vintage-modern-rustic living room where it fits in perfectly.

I really like the two different rug patterns working with each other.

Is there a faux cow rug in your future?
I think ours should work until the uncle comes through.
Love a great rug hack?
Be sure to check out these 14 painted rug hacks then!
Here’s a cool way to upgrade an astroturf rug too!
And don’t miss my trick for keeping rugs from sliding here!
Want to come back for the instructions later? Just pin the image below then!

Stalk Me Here:
Pinterest / Facebook / Twitter / Instagram
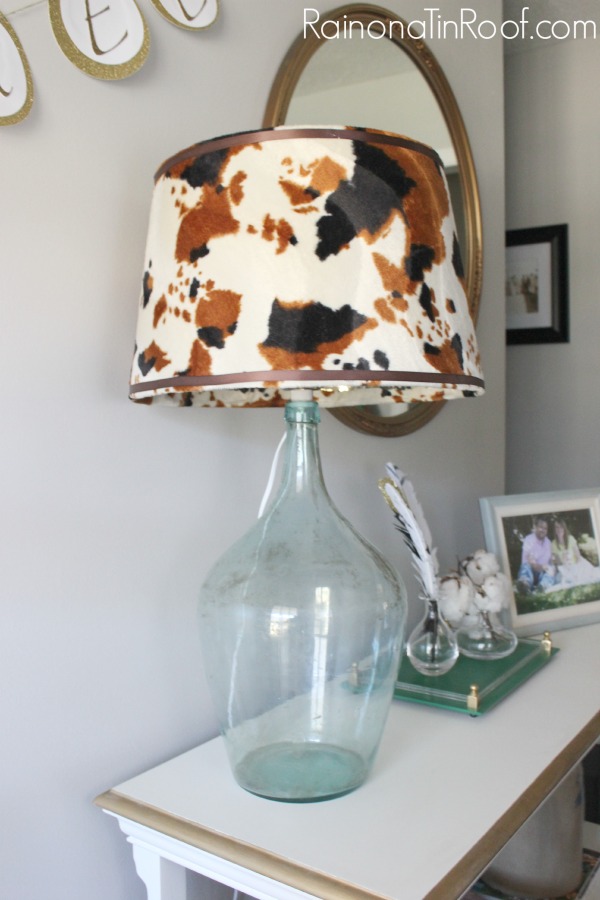

 I rolled the lampshade over the fabric to get a good idea of how much fabric I would need, then did a rough cut of the excess fabric.


 I sat the lampshade upright and snipped the fabric where the metal frame was, then hot glued those edges down and trimmed the fabric.

 And that’s it.

