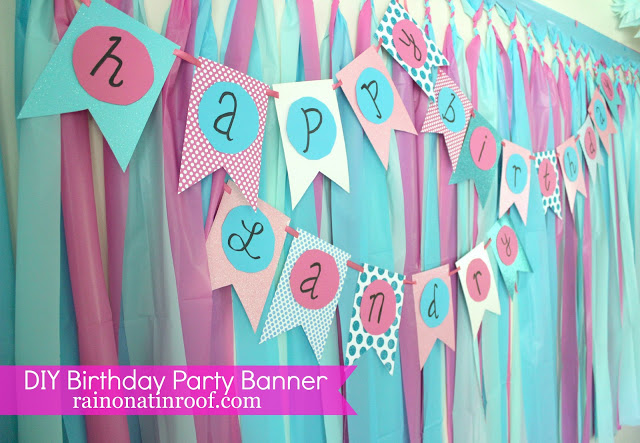
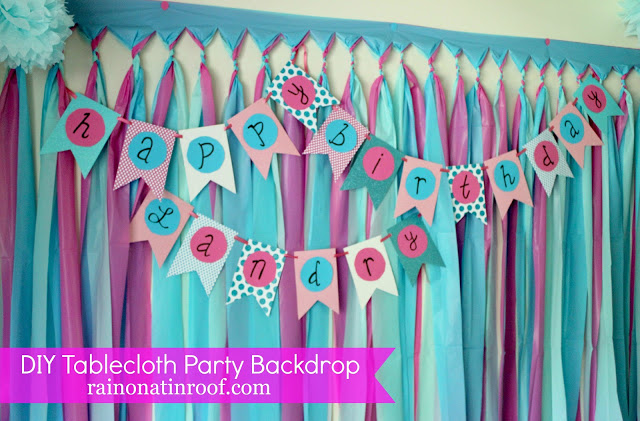
Tag: bunting

  • How to Make a Party Banner with PicMonkey

    How to Make a Party Banner with PicMonkey

    The Circus has turned five. 

    I’m not sure how we got here, or how we made it here all in one piece, but nevertheless, we did. #thankyajesus

    For her birthday party, she wanted a superhero theme – mostly Wonder Woman, but with a splash of Supergirl and Batgirl as well. #girlpower

    I was far too excited about this one. I love Wonder Woman. And really, all things girl power. 

    For the party, I made one of my super easy, super cheap party backdrops, then layered on a Wonder Woman / Superhero Style party banner I made using PicMonkey. 

    This tutorial will teach you how to make a party banner with PicMonkey. Customize the DIY party banner with your party theme - easy DIY Party Decor!

    The banner is really easy to make with PicMonkey. After you’ve created it, you just print it out, cut out the shapes, and string it together. 

    How to Make a Party Banner with PicMonkey

    Besides obviously needing a computer and the internet, you’ll also need a couple of other things after you print out the banner.

    Tools & Supplies

    Steps

    Step 1.

    Watch the video below to first make the banner using PicMonkey. Keep in mind you can customize the banner however you wish once you have the basic shape of the banner made – change up the colors, switch out the backgrounds, etc.

    Some of the fonts and features I used for the banner are part of PicMonkey’s Premium Features which aren’t available with the free version of PicMonkey. You can switch those out and use their free features or you can spring for the premium features, which are $3.99 – $7.99 per month. Personally, I couldn’t live without the premium features and the price is more than worth it to me. 
    [adthrive-in-post-video-player video-id=”MqDcJrnE” upload-date=”Tue Jun 06 2017 19:00:07 GMT+0000 (Coordinated Universal Time)” name=”How to Make a Custom Party Banner with PicMonkey” description=”Learn how to make a custom party banner using Picmonkey.”]

    Step 2. 

    Upload each of your banner files to a place where you can print them off. I used Staples for this and just uploaded all of my files into their copy and print services website, placed the order, then picked them up in-store. I printed mine out on a heavy 8.5 x 11 cardstock so that they would lay nice and flat against the backdrop. Also, be sure you print multiples of any letters you may need more than one of.

    Step 3.

    Once you get your banner sheets printed out, cut out around the shapes as I noted in the video. 

    Step 4. 

    To string the banner together, use the X-Acto knife and cut a small slit in each upper corner of each bunting. Weave your ribbon, string, or golden lasso 😉 through the buntings to connect them together. 

    This tutorial will teach you how to make a party banner with PicMonkey. Customize the DIY party banner with your party theme - easy DIY Party Decor!

    Hang the banner on the wall with thumbtacks or push pins. 

    This tutorial will teach you how to make a party banner with PicMonkey. Customize the DIY party banner with your party theme - easy DIY Party Decor!

    Our mini Wonder Woman thought the party decorations were pretty cool! 

    Do you have any favorite things to whip up with PicMonkey?

    You might also want to see…
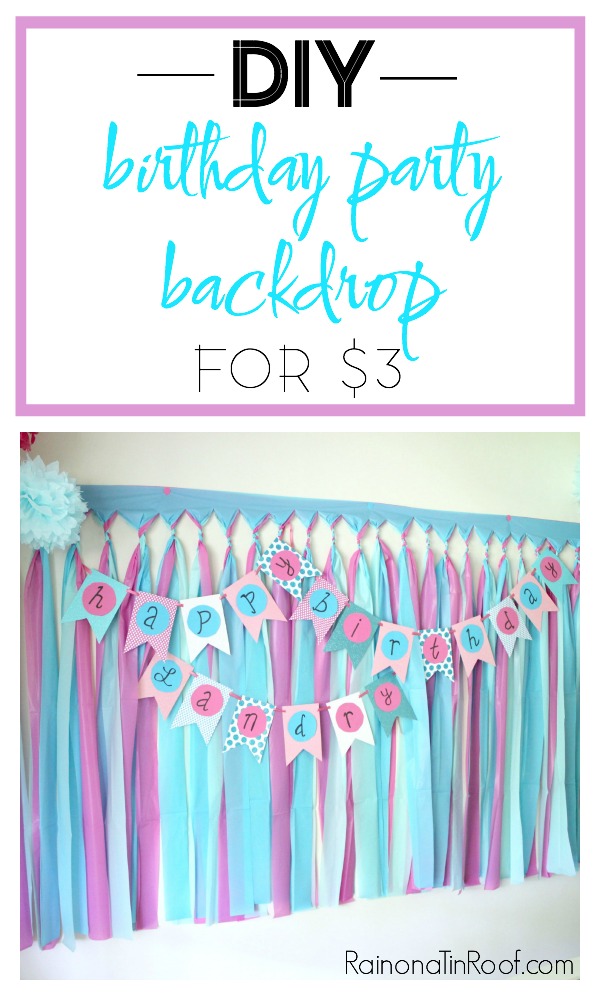
    How to make a DIY birthday party backdrop for $3.

    DIY Birthday Party Backdrop

    Simple DIY Birthday Party Banner with Paper and Scissors

    DIY Birthday Banner with Paper, Scissors and a Marker

    17 PicMonkey Tutorials, Tips, and Projects

    PicMonkey Tutorials, Tips and Projects

    Pin This Post

    This tutorial will teach you how to make a party banner with PicMonkey. Customize the DIY party banner with your party theme - easy DIY Party Decor!

  • Vintage Storybook Garland

    Vintage Storybook Garland

    I am a sucker for old Christmas storybooks.

    Doesn’t matter if they are barely bound together anymore, I buy them.

    They just have the best vintage-y Christmas colors and are so sweet.

    Last year, I made a vintage storybook garland to go around my tree with some of the pages from books that were falling apart. I didn’t post about it because I didn’t think it was a big deal. Then, when I did my Christmas tour last year and shared photos on Facebook recently, so many people said they loved the garland.

    And when the people talk, I listen.

    For the most part.

    So here it is.

    I don’t have step-by-step photos, but you won’t need them – its pretty simple.

    So sweet and simple to make! Vintage Storybook Garland via RainonaTinRoof.com

    This post contains affiliate links for your shopping convenience. Click here to read my full disclosure policy.

    DIY Christmas Tree Garland

    Materials & Supplies Needed:

    Steps

    Step 1:

    Lay the bunting template over the book pages, trace it onto your page, then cut it out.

    Step 2:

    With a small paintbrush, apply Mod Podge just around the edges of your now bunted (for lack of better wordage), book page. After applying the Mod Podge, immediately shake on some glitter and let it dry.

    Step 3: 

    After its dry, use your X-Acto knife to cut small slits into the upper edges of each page.

    Step 4:

    Run your string, twine, or ribbon through each page and hang it on your tree.

    So sweet and simple to make! Vintage Storybook Garland via RainonaTinRoof.com

    Like I said, I used a total of 18 pages for the garland, however I do cheat a bit and just string it back and forth on the front and sides – I didn’t have enough to go around the back of the tree.

    Judge if you want – I don’t care.

    So sweet and simple to make! Vintage Storybook Garland via RainonaTinRoof.com

    Lots of our pages also feature Mickey and friends – the kid loves him.

    Do you have a favorite garland or vintage storybook? 

    More kid-friendly holiday crafts and decorating ideas:

    Elf Hat Tree Topper – super simple to make and a fun topper for kiddos!

    7 Unusual but Meaningful Ornaments You Have Laying Around the House – break out the mementos for this one!

    Easily come back to this garland tutorial later by pinning the image below!

    So sweet and simple to make! Vintage Storybook Garland via RainonaTinRoof.com

    You know you don’t wanna miss any of this crazy.

    Sign up to get my posts delivered to your inbox here.

    Stalk Me Here:

    Pinterest / Facebook / Twitter / Instagram

    SaveSave

  • Easy DIY Cake Topper

    Easy DIY Cake Topper

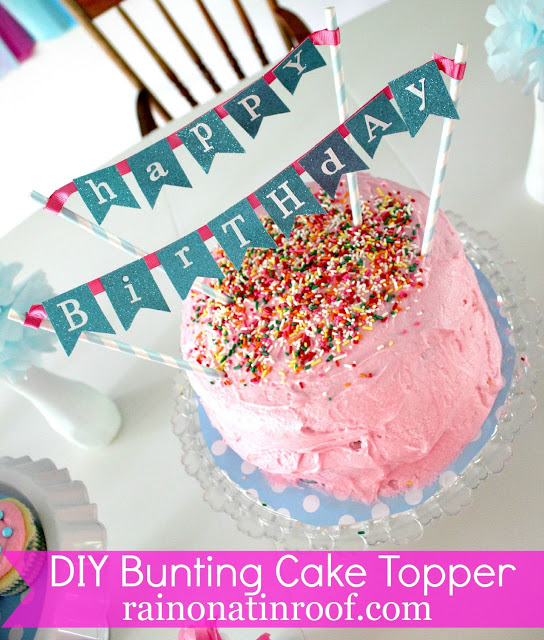
    I love a good cake topper because it can completely take a cake to the next level. The most important part is how good the cake tastes, but we need a cute little cake banner topper too, right? This DIY cake topper can easily be made in under 30 minutes – and no fancy cutting machines required.

    The final post of the blue and pink birthday party crafts. I’m not even gonna lie, I am sick of all this party stuff. I was tired of it about 10 minutes after the party ended. And that was a month ago. But, this custom cake topper is adorable and simple to make, so I had to share. It’s perfect for the sweetest occasion. <– See what I did there. hehehehe.

    Pink and Blue Cake Banner Topper

    Please disregard the sloppiness of the icing on the cake there. That would be where part of the cake fell off (my fault) and where my wonderful mother-in-law did the best she could do to salvage my mistake. Bless her.

    This post contains affiliate links for your shopping convenience. Click here to read my full disclosure policy.

    DIY Cake Topper

    Materials Needed for This Sweet Bunting Banner: 
    – Cardstock in your choice of color (Mine came from Hobby Lobby)
    – Letter Stickers (These too came form Hobby Lobby)
    – Ribbon (I used this kind.)
    – Hot Glue
    – Straws or some other stick or tubular device-thing-a-ma-jig to attach the bunting to and stick in the cake

    Step 1

    You will need to sketch out a flag bunting shape to use as a template. I did this with a ruler. Once it is sketched out, cut out the template and trace as many letters as will be on your bunting on the back of the card stock (this keeps any lines from being seen on the front and if you have glitter card stock like I did, you can’t really draw on glitter.)

    DIY Cake Topper using bunting template

    Step 2

    Cut out all the little flags and attach your sticker letters on them.

    Cake topper banner using scrapbook paper and stickers.
     
    Of course, you can make the banner say anything you wish, not just “Happy Birthday.”
     
    Step 3
     
    Cut off 2 strips of ribbon. Make it longer than you think it should be to have plenty for error. Line up your flags on the ribbon. Place a small dot of hot glue on the back top of each flag and immediately stick it to the ribbon.
     
    Step 4
     
    Its time to attach the bunting to your straws or whatever you are sticking in the cake to hold the bunting up. All you do is take your ribbon and wrap it around the top of the straw securing it with hot glue.
     
     
    Cake Bunting Banner Topper in pinks and blues
     
    Now, go stick that birthday cake topper in your cake.
     
    DIY Cake Banner Topper made from scrapbook paper.
     
    What do you think of our cake topper banner? Have you done any creative cake banners or toppers before?
     
    Want another easy DIY project for your parties? See these posts then! You can easily switch up the colors on these to make them fit perfectly for your own party! 
     
    DIY Cupcake Pedestals – these literally take cupcakes to a whole other level!
     
    1st Birthday Photo Collage – a sentimental decoration that is perfect for all kinds of parties! 
     
    DIY Party Banner – again, this one is great for various kinds of parties!
     
    DIY Party Backdrop – easiest thing to make with the biggest impact!
     
    DIY Party Hat – if you’ve got five minutes to spare, you can do this! 

    SaveSaveSaveSave

  • DIY Birthday Banner: Simple and Affordable

    DIY Birthday Banner: Simple and Affordable

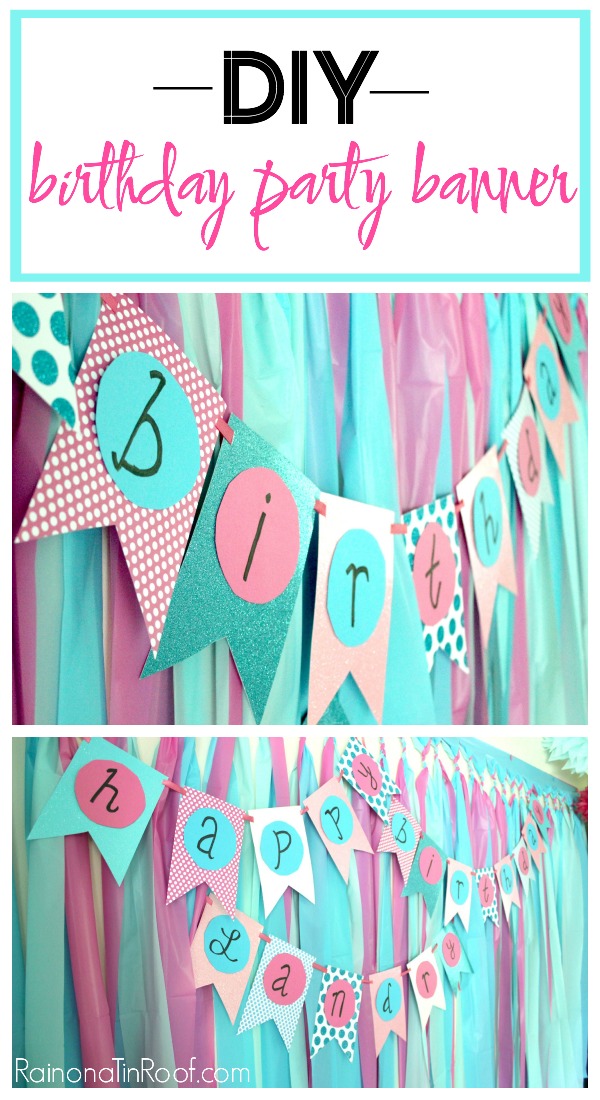
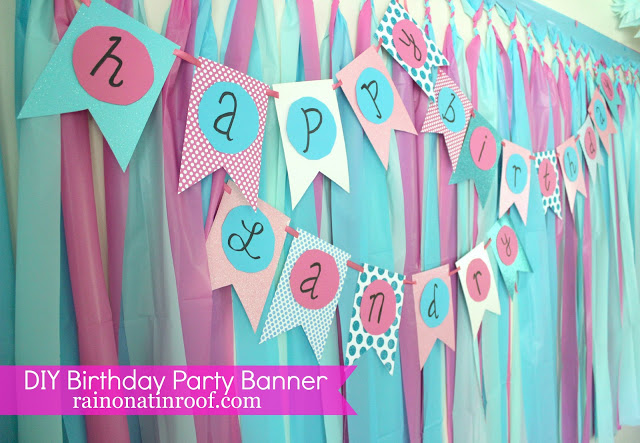
    Looking for a simple to make, yet adorable DIY birthday banner? Look no further! This DIY banner is easily made with a printable template, card stock, scissors and markers. You can fully customize it to match your party’s decor! 
    This DIY Birthday Banner is one of the many homemade DIY party decorations I made for my daughter’s 1st birthday party.
    DIY Birthday Banner - made with cardstock and markers -  Rain on a Tin Roof

     It was a blue and pink themed party with LOTS of DIY party decorations (did you really expect me to pay lots of $$ for it all considering how cheap I am?)!

    This DIY party banner hung on top of the DIY party backdrop. The banner was super simple to make and turned out really cute! Really, it can be a DIY banner for any kind of celebration – customize it to your own liking!

    This post contains affiliate links for your shopping convenience. Click here to read my full disclosure policy.

    Happy Birthday Banner DIY Project

    Materials Needed:

    • Scrapbook Paper or Cardstock (I got about two “flags” out of a 12×12 piece of scrapbook paper. I got all my paper at Hobby Lobby.)
    • DIY Birthday Banner Template (found here)
    • Adhesive Mounts of some sort (I used these)
    • X-Acto Knife or Hole Punch
    • Ribbon (I used this kind)
    • Sharpie
    • Scissors

    I know I took pictures of this process, but it appears, I have deleted those photos! I am so sorry, but I promise, this is so easy you really don’t need photos.

    Steps

    Step 1:

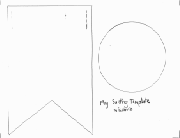
    Print out the banner template noted in the supply list from Miss Lovie Creations. She did a great job of making her DIY birthday banner and I did mine similar to hers.

    Happy Birthday Banner DIY - DIY Birthday Banner Template Printable -  Rain on a Tin Roof
    Source

    Step 2:

    Cut out the template. I used regular scissors for this.

    Step 3:
    Place the banner template over the back of your scrapbook paper or card stock and trace it with a pencil. Trace as many banners and circles as you will need. To spell out just “Happy Birthday,” you’ll need 13 banners.

    Step 4:

    Cut out the traced pieces. I used scissors for this as well, but you could use the X-Acto knife.

    Step 5:

    Place the circle template over scrapbook paper or card stock. Trace as many circles as letters you need. Again, you’ll need 13 to spell out “Happy Birthday.” I chose to use just blue and pink solid card stock for this so that my letters didn’t disappear on patterned paper.

    Step 6:

    Cut out circles.

    Step 7:

    Write your letters on the circles. I used a pencil to sketch the letters out and then just went over them with a sharpie.

    Step 8:

    Use the adhesive mounts or some other adhesive to attach the circles to the flags. Hot glue would probably work fine as well.

    Step 9:

    Use the X-Acto knife to cut small slits in each upper corner of the flags. If you don’t want to use the X-Acto knife for this, you could also use the hole punch.

    Step 10:

    Weave your ribbon in and out of the flags to string them together, then hang with thumbtacks.

    All done! Easy peasy!

    How to Make a Birthday Banner - Homemade birthday banner on party backdrop -  Rain on a Tin Roof

    I put my thumbtacks behind the backdrop to keep them hidden.
    DIY Banner - How to Make Homemade Banners using Cardstock -  Rain on a Tin Roof

    Now aren’t you glad you learned how to make a birthday banner?

    Told you it was super easy!
    Need more DIY party decoration ideas? I totally have you covered!
    DIY Birthday Party Hat – so cute and takes about 5 minutes to make with scrapbook paper!
    DIY Bunting Cake Topper – another easy scrapbook paper and sticker project!
    DIY Cupcake Pedestals – made with thrift store items and you can use them over and over again!
    DIY Tablecloth Party Backdrop – the easiest and cheapest party backdrop EVER! It’s made from plastic tablecloths!
    And you can always find all my DIY party decorations HERE!
    Want to come back here later? Just pin the image below!
    How to Make Homemade Banners for Parties -  Rain on a Tin Roof

    Sign up to get my posts delivered to your inbox here. 

    You know you don’t wanna miss any of this crazy.

    Stalk Me Here:

    Pinterest / Facebook / Twitter / Instagram

    How to Make a Happy Birthday Banner - customizable for any party -  Rain on a Tin Roof