Tag: storage

  • Five Minute DIY Stuffed Animal Storage

    Five Minute DIY Stuffed Animal Storage

    Does your kid have their very own, very complete stuffed animal zoo? Same here! They were taking over our lives until we got creative with our own DIY stuffed animal storage. Take advantage of your vertical space and learn how to store stuffed animals better below!

    As many of you may know, the kid and I are frequent thrift store shoppers. Thursday afternoons are what we like to refer to as ‘Thrift Store Thursday.’ I pick her up from school, we grab a snack from Sonic and onto the thrift stores we go to snag the treasures.

    One day at one of our usual thrift store haunts, the Circus and I noticed how they were displaying their stuffed animals vertically on chains. Now that I wrote that out, it sounds kind of like a 50 shades stuffed animal version, but I assure you that is not where this is headed. 😂

    Anywho, we analyzed their stuffed animal hanging storage that day and decided we could modify it and make it work perfectly in the Circus’ playroom.

    diy stuffed animal storage

    We came home, determined what we needed and pretty soon storing stuffed animals around here became so much easier. Did I mention that my kid is stuffed animal obsessed?

    Related: Need a different kind of toy storage in your kids room? Try these wall to wall shelves that we also use in my daughter’s play area!

    This post contains affiliate links for your shopping convenience. Click here to read my full disclosure policy.

    Hanging Stuffed Animal Storage

    This is an easy to install DIY project you can tackle in mere minutes!

    Supplies and Tools Needed:

    Steps

    Step 1


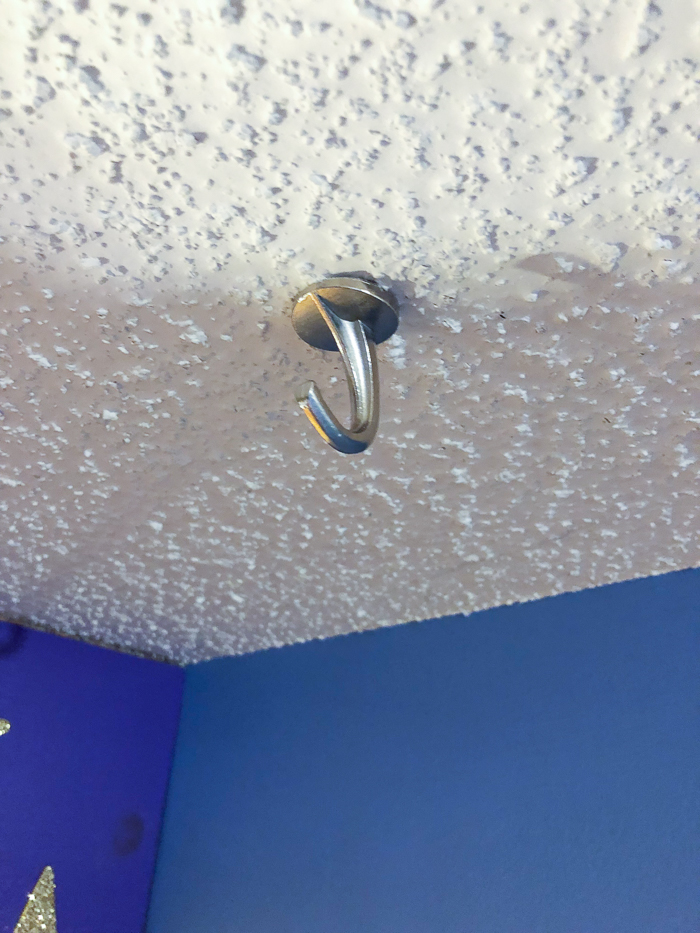
    Mark the location where you want your ceiling hooks to go. Keep in mind you want to come off the wall with them a bit as the stuffed animals will take up some space against the wall. We brought ours out about nine inches.

    Install the ceiling hooks according to the package directions.

    hanging stuffed animal storage - installing ceiling hooks

    Step 2

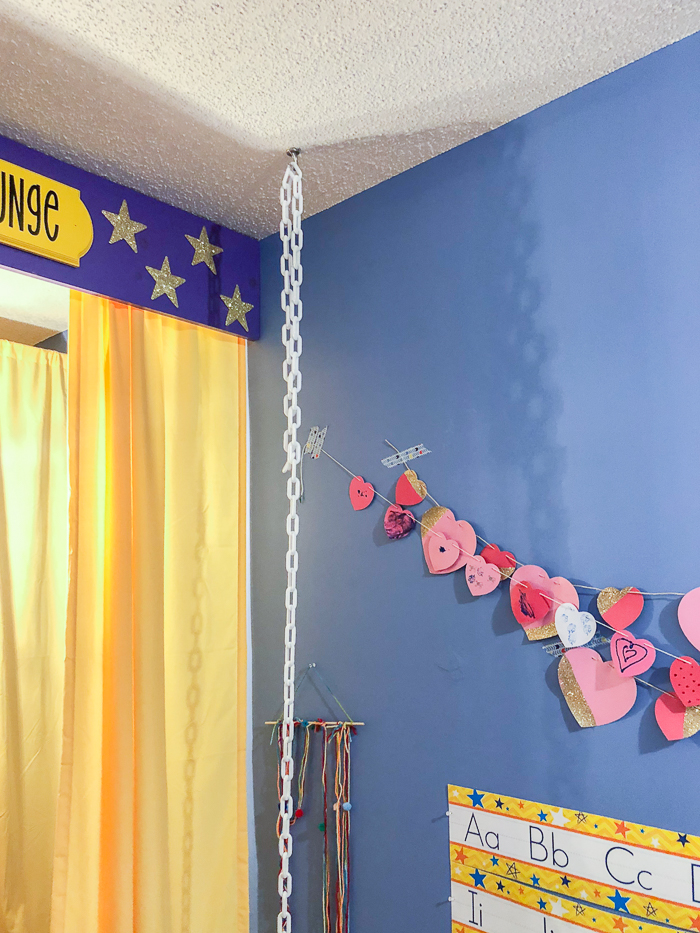
    Hang the plastic chain on the hooks.

    how to store stuffed animals - hanging chain from the ceiling

    Adjust the chain to the length of your liking.

    Step 3

    Clip the hooks onto the stuffed animals and hang on the chain.

    stuffed animal storage - hanging animals on plastic chains with clip hooks

    We did three vertical rows for the plush toy storage.

    stuffed animal storage ideas- hanging chain from the ceiling and hanging animals from clip hooks

    Organize stuffed animals to your liking. As you can see though, we have no organization method.

    storing stuffed animals vertically by hanging chains from the ceiling

    Let tell you though, having every last teddy bear, dog, rabbit, and all other species very visible has significantly reduced the risk of me breaking a leg in an attempt to find a certain animal.

    Related: Kids Play Table with Storage – perfect for playing farm, legos and more!

    Do you have any creative storage ideas for toys? Share them in the comments!

    Looking for another great idea for the kids? Here’s a few of our homeruns…

    Play Based Learning Play Stations – they won’t know they are learning while they’re playing too!

    How to Build a Kids Stage – and it has hidden storage for dress up clothes!

    DIY Wall Mounted Desk – this one has hidden storage as well and your kids will love having their very own creation station!

    Want to come back to this simple stuffed animal storage solution later? Just pin the image below!

    diy hanging stuffed animal storage from the ceiling - stuffed animals hung from the ceiling on chain.

    Keep up with more of myself and the Circus’ shenanigans on social media:

    Facebook | Instagram | Pinterest | Twitter

  • DIY Modern Rustic Bookshelf

    DIY Modern Rustic Bookshelf

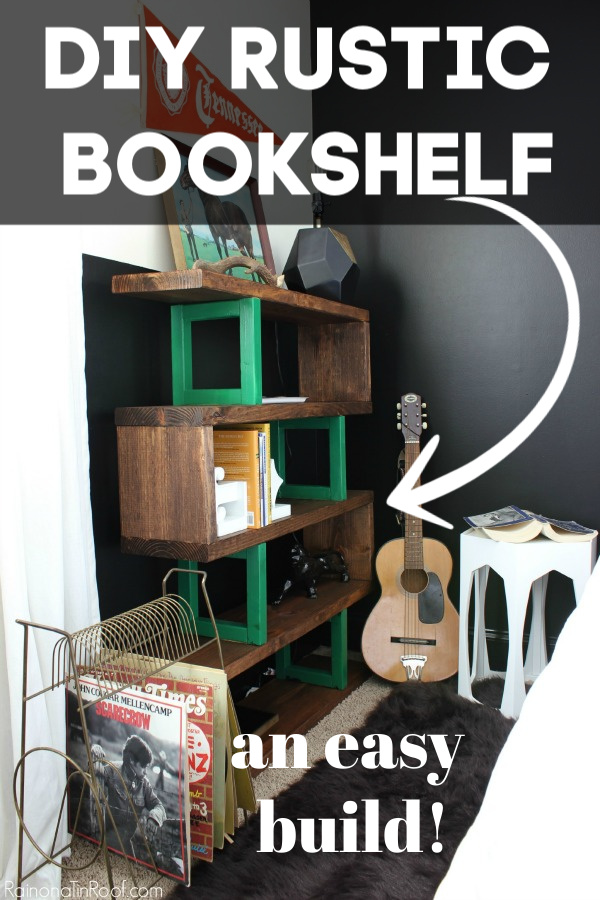
    Need a little more storage space in your home? Why not build a bookcase? This rustic bookshelf also has a gorgeous modern feel. It’s a simple DIY project that can easily be customized to your home’s style. 

    I am not a builder, y’all.

    I usually come up with amazing build projects and think they are going to be really easy and I can totally do it – then I have to call in Grunt Labor at some point for help.

    But this modern rustic bookshelf is so easy to build, Bill and I did it all by ourselves.

    Well, we did have Grunt Labor on standby.

    After Bill had decided what he wanted in his room makeover, I found this bookshelf over at Waiting on Martha.

    Rustic Bookshelf on animal print wall - Rain on a Tin Roof

    via

    I thought it would work perfect for his room, so I tracked down where it was from…All+Modern…and it was $1000.

    One Thousand Dollars.

    I’m sorry, but I just don’t know if I could ever bring myself to pay $1K for a bookshelf.

    On top of that, the bookshelf was quite a bit larger than what we needed or could even fit in the space. After looking at it though, I was totally like, we can build that. I sent an image of the shelf to Bill and asked if he liked it. His response was “That’s awesome.” So the next day, we went and bought our materials and came up with our own DIY bookshelf version for less than $50.

    Rustic Bookshelf DIY in a masculine bedroom - Rain on a Tin Roof

    It is seriously an easy build ya’ll and I am so thrilled with how well it turned out.

    Rustic Bookshelf DIY

    This post contains affiliate links for your shopping convenience. Click here to read my full disclosure policy.

    Materials Needed:

    Tools Needed:

    Cut List:

    • Five – 2″ x 10″ x 36″ (Cut the 2″ x 10″ x 10′ down into five 36″ long pieces.)
    • Four – 2″ x 10″ x 9 1/2″ (Cut the 2″ x 10″ x 10′ down into four 9 1/2″ long pieces.)
    • Eight – 2″ x 2″ x 6 1/2″ (Cut the 2″ x  2″ x 8′ down into eight 6 1/2″ long pieces.)
    • Eight – 2″ x 2″ x 9 1/2″ (Cut the 2″ x 2″ x 8′ down into eight 9 1/2″ long pieces.)

    Steps

    Step 1:

    Make all the cuts noted above.

    DIY Bookshelf - cutting the wood - Rain on a Tin Roof

    Step 2:

    Set aside the 2″ x 10″ cuts. Gather the 2″ x 2″ cuts, wood glue, nail gun and clamps.

    How to Build a Bookshelf - cutting the shelf supports - Rain on a Tin Roof

    Create a square using two of the 2″ x 2″ x 6 1/2″ pieces and two of the 2″ x 2″ x 9 1/2″ pieces as shown below. Put wood glue on all the joints and clamp.

    DIY Bookcase - assembling the shelf supports - Rain on a Tin Roof After clamping, nail the pieces together. Do not remove the clamps yet. We waited a few hours before removing the clamps to ensure the glue dried properly.

    Repeat this three more times to create a total of four “open” squares. These will become your shelf supports.

    After each square is completed and dried, paint or stain the squares the color of your choice.

    Step 3:

    Take one of the 2″ x 10″ x 36″ pieces and drill three pilot holes along the left end of the board.

    Drilling the holes for the rustic bookshelf - Rain on a Tin Roof

    After drilling the pilot holes, come back with a larger drill bit that is the size of the screws head and drill out just a little bit over the pilot hole – this is so you can countersink your screw and give the shelf a more finished look.

    On the same board, come in 9″ on the other end of the board and drill two more holes the same way you did above, however you only need one on each side of the board as shown below.

    Drilling pilot holes in the shelves for the DIY rustic bookshelf - Rain on a Tin Roof

    Step 4:

    Using the wood screws and drill, place one of the 2″ x 10″ x 9 1/2″ pieces on the end of the board where you drilled three pilot holes and secure it from the bottom of the longer 2″ x 10″ piece. Place one “open square” on top of the place where you drilled two pilot holes and secure this piece with wood screws from the bottom as well as shown in the image below.

    Assembling the diy bookshelf from the ground up - Rain on a Tin Roof

    It comes in really handy to have someone on standby to hold the pieces as you secure them.

    Step 5:

    Place one of the 2″ x 10″ x 36″ pieces on top of the pieces you just fastened together.

    Repeat the same process with the pilot holes and fastening the pieces together with the screws, however this time, you will be doing this from the top.

    The arrows in the image below indicate where your pilot holes and screws should go.

    How to Build a Bookcase - attaching the shelves - Rain on a Tin Roof

     Step 6:

    Place an open square and a solid square on the second shelf you just fastened together as shown below.

    How to Build a Rustic Bookshelf - attaching the supports - Rain on a Tin Roof

    Once more, you are going to drill pilot holes, then fasten the pieces together with screws as you did before. This time you will be coming up from the bottom. This is where we found that a right angle drill came in handy.

    DIY Rustic Bookcase - using a right angle drill - Rain on a Tin Roof

    It was easier to get the right angle drill into the tight spots, rather than the full size drill.

    Step 7:

    Place a 2″ x 10″ x 36″ piece on top of the open square and solid square you just fastened together.

    DIY Modern Rustic Bookshelf - assembling - Rain on a Tin Roof

    Repeat the pilot hole and fastening process as you did with the other shelves.

    Next, you will add on another open square and solid square, however you are alternating the location of each with each new shelf you add as you can see in the image above.

    Continue fastening on shelves and squares until you have no more left. You can also alter the size of the shelf by adding more or less shelves.

    Step 8:

    After the shelf is assembled, stain or paint it the color of your choice. I did this after the shelf was assembled, however, I should have done it before – would have been much easier!

    Modern Rustic Bookshelf DIY in a black and white bedroom - Rain on a Tin Roof

    $50 DIY bookshelf vs. $1000 bookshelf. I’ll take the $50 any day of the week.

    DIY Rustic Modern Bookshelf Build - guitar beside bookshelf - Rain on a Tin Roof

    Have you ever made a DIY bookshelf before?

    Want more easy DIY projects and decor ideas?

    See the full Masculine Bedroom Makeover – this shelf is used in here!

    How to Build Wall to Wall Shelves – built-in shelving that is easy, easy, easy to make and super functional.

    Power Tools 101 Series – Learn how to use a drill, saw and more – perfect for beginning DIYers!

    Want to remember this post? Pin the image below!

    How to Build a Modern Rustic Bookshelf - easy DIY project - Rain on a Tin Roof

    blog-signature-summer-15

    You know you don’t wanna miss any of this crazy.

    Sign up to get my posts delivered to your inbox here.

    Stalk Me Here:

    Pinterest / Facebook / Twitter / Instagram

    DIY Modern Rustic Bookshelf Build against a black wall - Rain on a Tin Roof

    SaveSave

  • DIY Clothes Rack for Garage Sales

    DIY Clothes Rack for Garage Sales

    Got a garage sale coming up? Learn how to make a clothes rack for a yard sale below! This simple to build DIY clothes rack for garage sales is great for not only secondhand sales, but excess clothes storage as well!

    Yard sale season is so close, I can almost taste it.

    Nearly every Friday come spring, the Circus and I will load up and hit all the area yard sales.

    And then on Saturday morning, we’ll do it again, courtesy of our chauffeur, Grunt Labor.

    And of course, my friends and I have become quite popular for our own yard sales as well.

    You have read The Yard Sale Chronicles post, right?

    At least two or three times a year, we all get together and host a yard sale, generally at my house. We hang out in the garage in our matching t-shirts drinking beer, Arbor Mist or Sangria if we’re lucky enough to get Kathryn to make it that day. We laugh and carry on and on more than one occasion, we’ve had customers ask if they can hang out with us for the rest of the day just for the entertainment.

    Yard sale days are a big deal around here.

    And since we’ve done it so much now, we just keep getting better and better at them. We have great signs, our shit is organized and mostly priced.

    And we all make a little money just for putting our shit for sale in the driveway, hanging out together and drinking.

    If that isn’t a win-win situation, then I don’t know what damn well is.

    My friend Jason recently had the grand idea of hosting a Secondhand Market. Basically, it was kind of like an upscale yard sale indoors. He did a great job organizing it and it went extremely well.

    At our yard sales, we generally hang a dowel rod between one of the garage door openings to hang clothes on, but for the Secondhand Market, I knew we would need clothes hanging storage that would stand alone. I made some DIY clothes racks that were a super simple build and to top them off, I also made printable size dividers to use for the sale.

    DIY Clothes Racks - perfect for extra hanging clothes storage, yard sales and kid's closets. Rain on a Tin Roof

    I’m sharing both the instructions for the homemade clothes rack and the printables with you!

    How to Make a Clothes Rack for a Yard Sale

    This post contains affiliate links for your shopping convenience. Click here to read my full disclosure policy.

    How to Make a Clothes Rack For a Yard Sale from 2x4s - Rain on a Tin Roof

    These are a super simple build and inexpensive as well. I made three different sizes (height wise) of these racks. I’m sharing the instructions for the shortest one, 4′ tall, below. The other two I made were 4 1/2′ tall and then 5′ tall. You can make taller ones, simply by cutting your 2″ x 4″ end posts to whatever your desired height is.

    Tools & Supplies Needed:

    Steps

    Step 1

    Make your cuts first. Cut the 2″ x 4″ pieces down to the following lengths:

    • 2 – 48″ long pieces
    • 8 – 10″ long pieces

    I used my miter saw to cut my pieces, but you can use a circular saw as well.

    If you want to cut your dowel rod down to a certain length, you can do that now as well. I bought mine at 8 feet long and opted to leave them that long.

    Step 2

    Take each of your 48″ long 2″ x 4″ pieces and mark 1 1/2″ down on one end of each piece. Using your drill and the 1 1/4″ hole saw drill bit, drill out a hole at each mark you made. This will be the top of your clothes rack where each dowel rod will slide into.

    Making a diy clothes rack for yard sales.

    Step 3

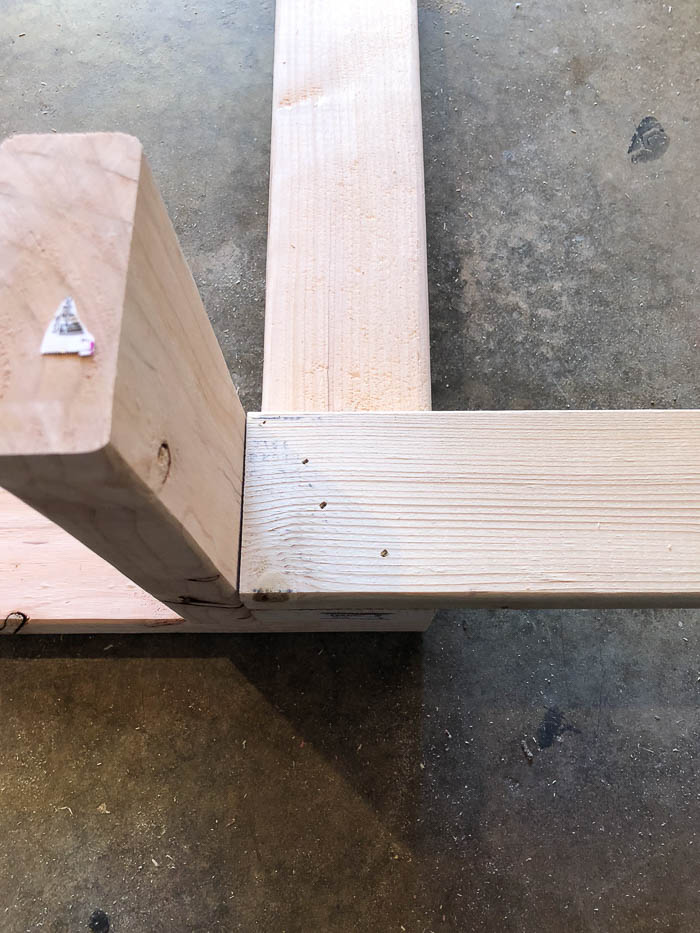
    Take one of the 48″ long 2″ x 4″ pieces and lay it flat against the ground. On the opposite end of where you drilled out your hole, attach one of the 10″ long 2″ x 4″ pieces perpendicular, but lined up on one edge of the 2″ x 4″ as shown below.

    Making homemade clothes racks for garage sales. Rain on a Tin Roof

    I did this using my nail gun because it was close by and made the job go super fast. A good ol’ hammer and nails or wood screws will do the trick as well though.

    Turn the 48″ long 2″ x 4″ on its side. Line up another 10″ long 2″ x 4″ piece and attach it as shown below.

    Homemade clothes racks for garage sales. Rain on a Tin Roof

    Turn it again. Attach another 10″ piece.

    Hanging clothes on DIY Clothes Racks for yard sales. Rain on a Tin Roof

    Repeat one more time.

    Extra Clothes Storage: How to Make a Clothes Rack - Rain on a Tin Roof

    You should have four feet on your 48″ long 2″ x 4″.

    Making a clothes rack for garage sales. Rain on a Tin Roof

    Repeat this process with the other 48″ long 2″ x 4″.

    Step 4

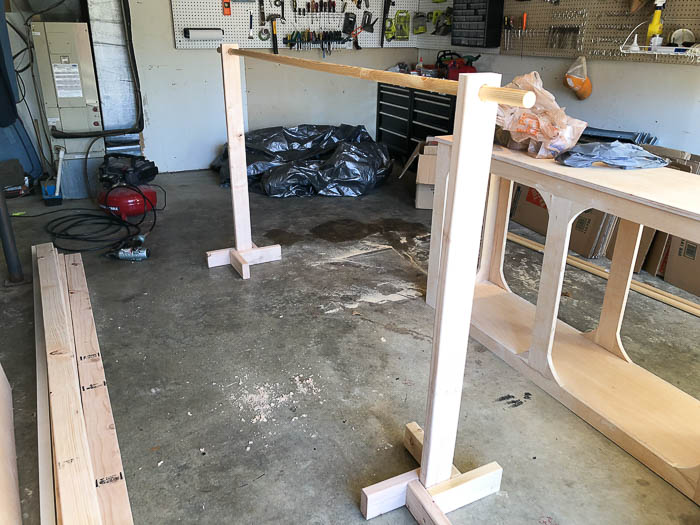
    Slide the dowel rod through the top holes of each 2″ x 4″.

    DIY Clothes Rack for Hanging Clothes at Garage Sales - Rain on a Tin Roof

    That’s all there is to the clothes racks!

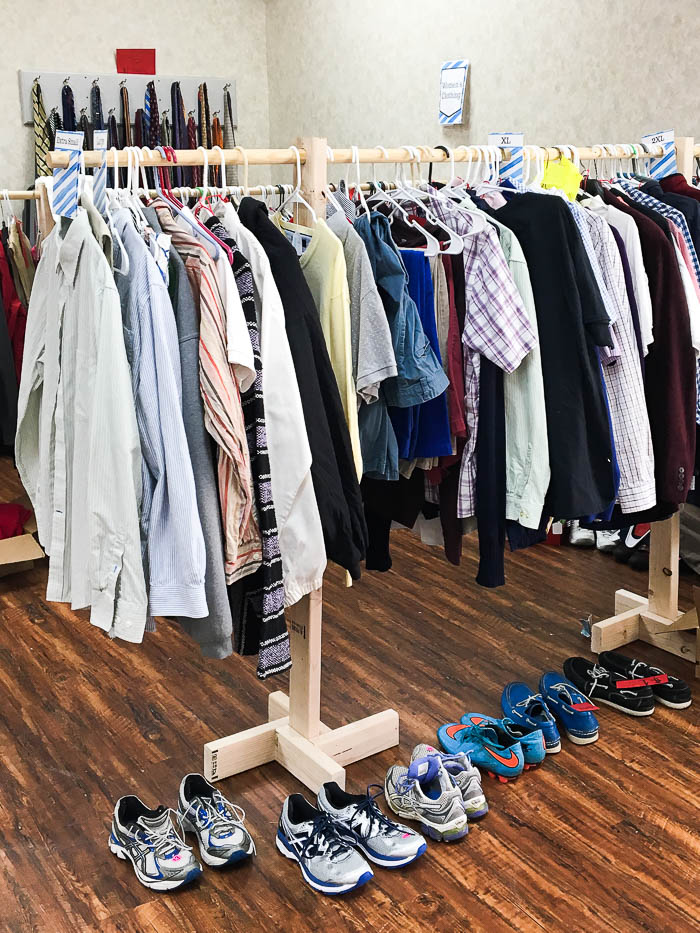
    How to Hang Clothes at a Garage Sale - clothes on racks - Rain on a Tin Roof

    How to Hang Clothes at a Garage Sale

    Once you get all your clothes on the racks, if the dowel rod is sagging in the middle, then just move your end leg pieces in more.

    Garage Sale Clothes Rack - Rain on a Tin Roof

    This will stabilize the clothes rack and you’ll still have plenty of hanging room on the ends and in the middle.

    When hanging clothes, it’s always a great idea to divide the clothing by gender (male/female), adult sizes, and children’s sizes. On top of that, it’s even better if you divide it by size. This makes it much easier for your yard sale customers to browse through the clothing and find what may fit them, instead of them getting frustrated that everything is so unorganized.

    To organize and divide the clothing, be sure to grab this set of free printable size dividers right here!

    Print off as many sets as you’ll need for organizing the clothing. I have a set for adult men, adult women, little boys and little girls clothing.

    Yard Sale Clothes Rack - Rain on a Tin Roof

    I hope you’ll find the racks and size dividers helpful for selling more at your next yard sale!

    More posts you might find helpful:

    The Best Yard Sale Tips – all the things I’ve learned about hosting yard sales for the better part of a decade.

    How I Made $2K+ in Two Months Selling Our Clutter – find out my tips for getting the most money for your clutter!

    Want to remember these clothes racks for later? Pin the image below then!

    Homemade Clothes Racks for Yard Sales and Extra Storage - Rain on a Tin Roof
    Gift Ideas Signature

    SaveSave

  • 5 Simple Storage and Organization Ideas that are Life-Changing

    5 Simple Storage and Organization Ideas that are Life-Changing

    Ok, I feel like the title of this post is slightly dramatic. But. These five simple storage and organization ideas have seriously changed and simplified our home.

    Whenever we moved into the 70’s Landing Pad, something happened to me.

    I got bit by the purge and organize bug. This bug bite though, was a welcome one.

    I got rid of so much stuff, y’all. Enough for two huge yard sales and now even more waiting for another yard sale in our garage. (P.S. My best yard sale tips are here.)

    I went label and bin crazy. Whatever could fit in a bin, went in one and got a label slapped on top of it.

    By no means am I now an organizing pro. Trust me, I still have hot messes in many areas of our house. But after doing these five things, I’m always trying to figure out what else I can better store, organize, purge, etc.

    Here are the best five things I’ve done to organize and create storage in our home since we’ve moved in. All of them are pretty simple and most are very budget-friendly. Cheap and easy, baby. My kinda projects. 😉

    Simple Storage and Organization Ideas

    Affiliate links may be contained in this post.

    1. Cleaning Closet

    Create a cleaning closet - even more great ideas in the post! 5 Simple Storage and Organization Ideas that are Life-Changing

    If you’ve ever looked for cleaning or organization ideas on Pinterest, no doubt you’ve seen this idea from lots of other people. I’m certainly not trying to steal the credit for it and honestly there are so many people who’ve done this, I’m not sure who the “originator” is. I just wanted to show you my version. We had enough room in our master bedroom closet to move all the coats in there and free up this hall closet to make it the “cleaning closet.” It houses all our cleaning supplies in one central location which has been so handy. All the cleaning bottles are held in an over-the-door shoe organizer.

    You’ll have to forgive my poor pictures of this space – it’s in the hallway which isn’t exactly the roomiest place on earth. 

    Create a cleaning closet: 5 Simple Storage and Organization Ideas that are Life-Changing

    I also bought a half-size hanging organizer which holds dust rags, wipes and Swiffer refills. I’ve got more details on how I organized this space (and a great tip for easy bathroom cleaning!) in the video below.

    2. Entertainment Center turned Storage Central

    A.K.A. The Three Boxes of Steel

    5 Simple Storage and Organization Ideas that are Life-Changing: Turn an old entertainment unit into a storage center! More great storage ideas in the post!

    I picked up this old entertainment unit at a local thrift shop for $100. I knew I would need something bigger than anything I had to go against the long wall that connects the living room and dining room. I sent Grunt Labor and Nicky to get it, but didn’t tell them anything about it’s size. They both came back and thanked me kindly for having them pick up three steel boxes. I haven’t been able to send them on any errands since. Lurking behind those doors though isn’t a television….

    5 Simple Storage and Organization Ideas that are Life-Changing: Turn an old entertainment unit into a storage center! More great storage ideas in the post!

    It’s storage central for all our china, wine glasses, entertaining items, serving pieces, etc.

    5 Simple Storage and Organization Ideas that are Life-Changing: Turn an old entertainment unit into a storage center! More great storage ideas in the post!

    I was able to put all the items that had been in two buffets at our old house into this piece with room to spare.

    You can watch the video below for more details on our cleaning closet and entertainment unit turned storage central.
    [adthrive-in-post-video-player video-id=”HFDwE4ai” upload-date=”Tue Aug 30 2016 00:00:00 GMT+0000 (Coordinated Universal Time)” name=”Rain on a Tin Roof – Life Changing Organization Ideas” description=”Use these simple storage and organization ideas to make your home a little less hectic.”]

    3. Vanity Organization

    In the master bathroom at the new house, we ran into a slight organization problem with the vanity, it has no drawers – only two large doors. Now that was the look I wanted and it was far cheaper to buy it than one that had drawers, but just having one big open space wasn’t great for organizing items.

    Bathroom Organization - more great ideas in the post! 5 Simple Storage and Organization Ideas that are Life-Changing

    I fixed that with bins and baskets from the Dollar Tree.

    Use command hooks and Dollar Tree bins for vanity organization. More great ideas in the post! 5 Simple Storage and Organization Ideas that are Life-Changing

    My favorite little trick here was hanging these small baskets with command hooks on the back of the vanity door. The top one has my toothbrush and toothpaste, the middle one has Q-tips and cotton rounds and the bottom one has my hair clips and nail clippers. It is great for keeping all those little items that would normally fall into the deep abyss in one place.

    Bathroom Organization - more great storage ideas in the post! 5 Simple Storage and Organization Ideas that are Life-Changing

    Inside the vanity, I just arranged bins and put items in them accordingly. These actually stack, but I’ve found they are better for us just sitting there.

    4. More Containers and Bins and Easy Labels

    The Dollar Tree container aisle and I have been great friends. Not only did I use them for the bins above, but also for organization in my kitchen drawers.

    Great and really simple storage ideas! Pretty cheap too! 5 Simple Storage and Organization Ideas that are Life-Changing

    The baskets in the kitchen drawers help keep cooking utensils from getting pushed to the back of the drawer where I can’t find them.

    I also used larger bins and the baskets in my craft closet.

    Awesome and really simple ideas! 5 Simple Storage and Organization Ideas that are Life-Changing

    All of this stuff used to just be dumped in drawers at our old house. I organized everything and labeled the bins with FrogTape so that if I ever needed to change out the label, there wouldn’t be any sticky residue left behind. Like I said earlier, I certainly still don’t have it all together. You can see that shelf below is a hot mess – it’s where I keep all the random home accessories that haven’t found a home yet and also a troll that was Grunt Labor’s when he was a kid. I know – weird.

    5. Maximized Under-Bed Storage

    Two of the three beds at the 70’s Landing Pad have SmartBase Foundations.

    5 Simple Storage and Organization Ideas that are Life-Changing - how to maximize under-bed storage! More great ideas in the post!

    The SmartBase Foundations work as the bed rails and box spring for the bed, but increase the storage underneath. So where you see the top of the foundation that the mattress sits on would normally be the top of the box springs, therefore the base creates more storage under the bed because it doesn’t take up as much room as a traditional box spring would. We were going to have to buy bed rails and a box springs for both our bed and the Circus’ bed. Getting the smart bases instead was cheaper and increased our storage, so it was a no-brainer. It’s been especially handy in the Circus’ room.

    Do you have any other simple organizing tips or storage ideas? I am all ears, y’all! Hopefully I was able to help you a little bit and send the organizing bug your way. 😉

    Liked this post? Then you’re probably going to want to see these…

    This is an awesome printable - perfect for decluttering your home! 9 MUST READ Cleaning Tips!

    15 Days to a Clutter-Free Home

    Full of easy to do ideas that are pretty, but also functional. 10+ Kitchen Ideas: Decorating, Organizing, Storage

    10+ Kitchen Ideas for Decorating, Organizing and Storage

    Create a one-stop workshop in your garage with this DIY Mobile Workbench and Pegboard Organization Ideas.

    One Stop Workshop: Ultimate Pegboard Organization + DIY Mobile Workbench

    Had NO CLUE on most of these! Must Read Cleaning Tips

    9+ Must Read Cleaning Tips

    blog-signature-summer-15

    pin-this-post-2

    These budget friendly simple storage and organization ideas will have you wishing you had known about them sooner! They will simplify your home and life!

    SaveSave

    SaveSave

  • DIY Headband Holder for $5

    DIY Headband Holder for $5

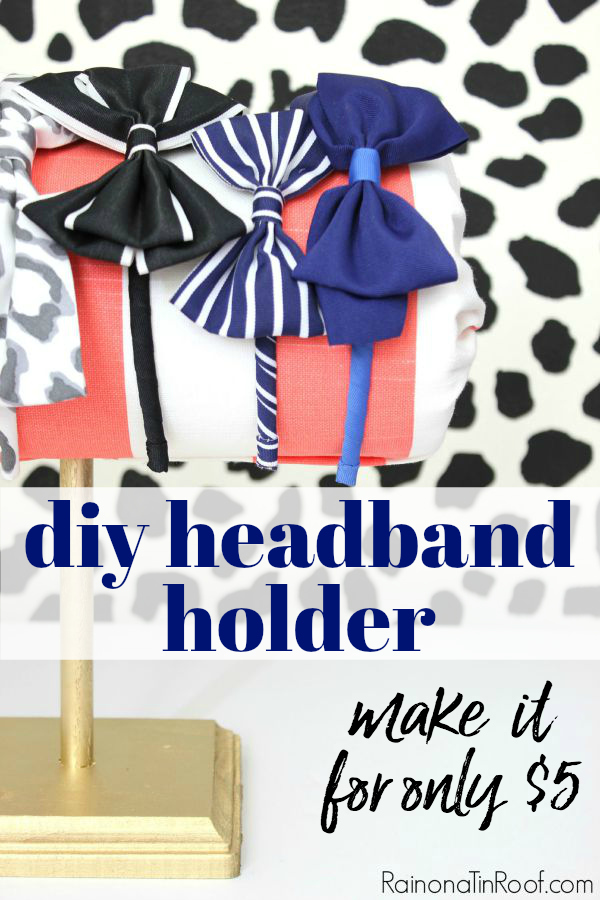
    Swimming in a sea of headbands for your little girl and not sure how to store and organize them? Then, learn how to make a headband holder below! This DIY headband holder is a perfect (and easy!) solution for headband storage.

    Remember our Aunt Rochelle?

    The aunt that you wanted for yourself?

    The one who sends the circus ensembles complete with matching shirts, pants, dresses, cardigans and even sunglasses.

    Well, that amazing Aunt Rochelle, she also sends hair accessories to match every single outfit she’s ever bought for the circus – mostly of the headband variety.

    She’s pretty much any little fashionista’s dream. 

    She is 100% the reason why the kid wins best dressed at preschool every year.

    Well, there really isn’t an award for that, but if there was, she’d have it in the bag. 

    While the circus will wear, and love, every shirt, shorts, dress, sunglasses and everything else Aunt Rochelle sends, she isn’t always a fan of the headbands.

    So I had a brilliant idea when I made her dress-up station.

    I would also make a headband holder so the circus would easily spot her headbands and in theory, want to wear them.

    DIY Headband Holder

    Headband Holder - easy diy project - Rain on a Tin Roof

    This post contains affiliate links for your shopping convenience. Click here to read my full disclosure policy.

    By the time I got to this addition of the dress-up station, funds were low, so I was scrounging around for cheap materials for this. I managed to make it for about $5 total – and you’re never going to believe what I used for the actual headband holder part…

    Materials Needed: 

    DIY Headband Holder - Supplies - Rain on a Tin Roof

    *Ignore the Mod Podge in the image – I ended up not needing it. 

    • Paper Towel Roll, preferably about 1/2 – 3/4 used. (yep, not kidding.)
    • Wood Base / Plaque (mine came from Michael’s – don’t forget to use a coupon!)
    • 5/8″ dowel – cut down to about 8 inches or so. You can easily make it shorter or taller if you wish, just cut the dowel accordingly.
    • Wood Glue
    • Drill and Drill Bits
    • Gold Spray Paint or another color of your choice
    • Fabric – about a 24″ inch square or so. You’ve probably got scrap laying around you can use.
    • Hot Glue Gun
    • X-Acto Knife
    • Scissors

    Step 1:

    Mark the center of your wooden plaque. Attach a drill bit that is the same size as the wooden dowel and drill a hole through the wooden plaque where you marked the center.

    How to Make a Headband Holder - drill hole in wood plaque - Rain on a Tin Roof

    Step 2: 

    After you have cut your dowel down to your desired size, place a little wood glue around the bottom of the dowel and insert it into the hole that you just made.

    Headband organizer - put wooden dowel in wood plaque - Rain on a Tin Roof

    Wipe away any excess glue from around the edges and let it dry for about 30 minutes.

     Step 3: 

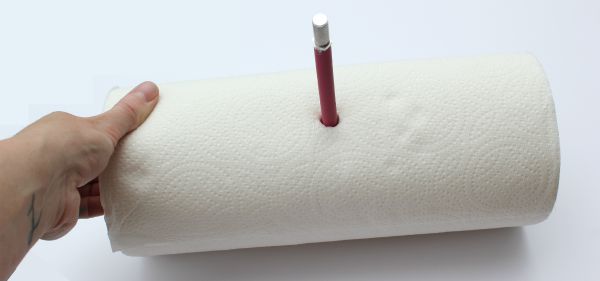
    While the glue is drying, cut a hole in the center of the paper towel roll using the X-Acto Knife. You want to go through one side of all the paper towels and the cardboard roll in the middle, but not all the way through the roll.

    Headband Storage - put hole in center of paper towel roll - Rain on a Tin Roof

    I found it easiest to punch a hole through the roll with the knife first and then kind of carve out the circle.

    Step 4: 

    Spray paint the wooden base and dowel.

    Step 5: 

    While the base and dowel are drying, wrap your fabric around the paper towel roll. Start by hot gluing an edge onto the paper towels where you made the hole and then wrapping around the other edge. Put a small line of hot glue along the edge that will be seen and fold it over so you have a clean edge, then hot glue that onto the paper towel roll just covering your first edge.

    headband storage organizer - cover with fabric - Rain on a Tin Roof

    Use scissors to cut a small hole in the fabric where the hole in your paper towel roll is. For the ends of the fabric, put a little hot glue inside the paper towel roll edges, then just shove the material into the edges.

    Step 6: 

    After the base and dowel is dry, slide the covered paper towel roll onto the dowel.

    Headband Storage Ideas - paper towel roll covered in fabric - Rain on a Tin Roof

    And now you have an adorable way to store and organize all those headbands!

    And ya know what, even though the kid now has this adorable little headband organizer, she still doesn’t wear all her cute headbands.

    Nope.

    She wants me to wear them instead. 

    Most days, you can find me sporting a huge pink bow on my head.

    Update: Just in case you were wondering, it’s now been nearly four years since we made this headband holder and we’re still using it! Paper towel rolls are pretty sturdy when they need to be!

    Will you be making a headband organizer?

    Looking for more great accessory storage ideas for your kiddos?

    This DIY sunglasses holder is a fun way to display all the kid’s shades.

    They will adore having their own dress-up closet! Psst….it’s easy to make too!

    And be sure to see these six pretend play stations for kids – they’ll even learn while they’re playing at the stations!

    Want to come back to this headband holder later? Just pin the image below!

    Headband Organizer DIY - hair accessories storage for little girls - Rain on a Tin Roof

    And Stalk Me Here…

    Pinterest / Facebook / Twitter / Instagram

    blog-signature-summer-15
    headband organizer diy - headband storage for little girls - Rain on a Tin Roof

    SaveSave

  • 10+ Kitchen Ideas for Decorating, Organizing, and Storage

    10+ Kitchen Ideas for Decorating, Organizing, and Storage

    I am all about a pretty space.

    I’m also all about a real life space.

    The problem is that pretty + real life don’t always work together.

    And real life tends to trump pretty everyday of the week.

    I always struggle with finding that happy balance between pretty and real life in the kitchen.

    Prime example: the chips will always live on top of the fridge. No, its not pretty, but that’s where we expect them to be, so that’s where they will always be come hell or high water unless we magically get more pantry or cabinet space…which I won’t hold my breath for.

    That being said, these are my best kitchen ideas for merging real life and pretty. 

    Doritos bag on the refrigerator not included. 

    Full of easy to do ideas that are pretty, but also functional. 10+ Kitchen Ideas: Decorating, Organizing, Storage

    10+ Kitchen Ideas: Decorating, Organizing, Storage

    #1. Create a coffee station. 

    Create a coffee station. 10+ Kitchen Ideas: Decorating, Organizing, Storage

    This coffee station has only been around for the last few months and let me tell you it has made my morning coffee ritual so much smoother. You see, I tend to want my morning coffee faster than the Keurig can make it. I know – that’s like the purest definition of impatientness (which probably isn’t even a word) ever. It is what it is. I corralled my K-Cups, sugar, and spoons all on a cheap little IKEA tray to get my coffee in my mug as soon as possible. The only thing that isn’t there is the creamer in the fridge. Obviously, its not realistic to leave the creamer sitting out overnight uncovered, so I used that pitcher for my spoons. The little Cafe du Monde sign is a nice reminder of my favorite city in the world.

    #2. Use a locker basket to hold fruit.

    Use a locker basket to hold fruit. 10+ Kitchen Ideas: Decorating, Organizing, Storage

    I hate those banana hanger/holder things. I have no idea why, but they drive me crazy. Instead, I use a vintage locker basket to hold all our fruit.

    #3. Use a shiny pitcher to hold cooking utensils. 

    Use a silver pitcher to hold cooking utensils. 10+ Kitchen Ideas: Decorating, Organizing, Storage

    When I found that silver pitcher at Goodwill, I nearly peed my pants. It does the job of holding all the ugly cooking utensils, while adding a touch of chic.

    #4. Use a tray to corral salt, pepper, olive oil, etc. 

    Use a tray to corral olive oil, salt, pepper, etc. 10+ Kitchen Ideas: Decorating, Organizing, Storage

    Right beside the silver pitcher is a small rustic-y tray that holds salt, pepper and olive oil. The tray keeps everything corralled in one spot and makes them feel unified.

    #5. Bring in color with barstools. 

    Bring color into a kitchen with barstools. 10+ Kitchen Ideas: Decorating, Organizing, Storage

    Lots of kitchens lack color. In fact, just about everything in my kitchen is black and white except for the barstools and curtains. In terms of furniture, barstools are pretty cheap, which makes them a perfect candidate for color. Buy a cheap pair at Target and spray paint them or scour thrift stores for some to makeover. I gave my barstools a kelly green and navy blue makeover a couple years back and I’ve been in love ever since.

    #6. Switch out your hardware. 

    Switch out old hardware and cover the previous holes. 10+ Kitchen Ideas: Decorating, Organizing, Storage

    Granted, I painted my cabinets and switched out their hardware, but never underestimate the power of just switching out hardware. Grunt and I did this at our little cottage and it totally changed the look of the entire kitchen. We probably spent less than $50 on new hardware and it had a big impact. You can even change the location of your hardware and cover the holes easily.

    #7. Don’t want to trade out your hardware? Try restoring it. 

    Instead of switching out old hardware, restore it. 10+ Kitchen Ideas: Decorating, Organizing, Storage

    If your hardware is pretty old, chances are, it could use a good cleaning. Clean it up and you might realize you have a little gem under all the grime. Here’s how to restore your hardware.

    #8. Build your own island or peninsula. 

    AWESOME IDEAS - dressers turned island, build your own island, and more! 7 Kitchen Island Ideas You Haven't Thought Of... via RainonaTinRoof.com

    Yes you can. I know some of you were just like, “No way can I make my own island.” Y’all, if Grunt and I can, anyone can. Our kitchen island (in the photo with the barstools earlier) was made from porch posts and salvaged barn wood – and it only costs about $100 to make, excluding the counter. And if you don’t want to build one, look at these seven different kitchen island ideas – you can even use a dresser for an island.

    #9. Have fun with sweets. 

    Display treats in a unique way. 10+ Kitchen Ideas: Decorating, Organizing, Storage

    This mohawk lollipop holder is definitely not all that kitchen-y. Its not really even needed. Buts its fun and quirky. And I like that. The kid especially loves getting her lollipops out of the mohawk.

    #10. Use locker baskets for cookbook storage.

    Store your cookbooks in an unconventional way. 10+ Kitchen Ideas: Decorating, Organizing, Storage

    A kitchen ideas post wouldn’t be complete without my vintage locker basket cookbook storage. Almost three years and they haven’t budged.

    #11. Ditch some upper cabinets for open shelving. 

    Instead of having all upper cabinets, opt for some open shelving. 10+ Kitchen Ideas: Decorating, Organizing, Storage

    When Grunt Labor and I started the kitchen reno, I knew I wanted open shelving somewhere. Originally, I wanted it on both sides of the window (and would still like that), but there wasn’t enough space for the shelving we bought from IKEA on the left side of the window. The shelving is pretty and functional. In the photo above, its holding my whiteware, but now it actually holds dishes and glasses. You can see our entire kitchen renovation here.

    What are your best kitchen ideas for decorating, organizing, and storage? 

    Want more real life decorating ideas? 

    14 Real Life Bedroom Ideas Anyone Can Do – totally doable, totally real life.

    20+ Living Room Ideas – for every kind of design style.

    You know you don’t wanna miss any of this crazy.

    Sign up to get my posts delivered to your inbox here.

    Stalk Me Here:

    Pinterest / Facebook / Twitter / Instagram

    pin-this-post

    Full of easy to do ideas that are pretty, but also functional. 10+ Kitchen Ideas: Decorating, Organizing, Storage

  • 14 Real Life Bedroom Ideas Anyone Can Do

    14 Real Life Bedroom Ideas Anyone Can Do

    Ok, ya know how sometimes when you are reading a magazine or browsing on Pinterest, and you see those perfectly gorgeous bedrooms? There is high end wall art, beautiful mirrors, comfy bedding, and perfect antique furniture.

    And you know that the bedding alone probably cost $1000?

    If you have $1000 to spend on bedding or on a mirror or wall art, by all means, go for it.

    I don’t.

    Hell, I can’t remember when the last time was that I had $1000 to spend on a whole room.

    Oh, wait, yea, I haven’t ever had that.

    So, for the rest of us that want beautiful bedrooms without breaking the bank, here are 14 real life bedroom ideas that anyone can do.

    Real Life Bedroom Decorating Ideas

    #1 – Create An Accent Wall

    14 Real Life Bedroom Ideas Anyone Can Do - create an accent wall

    Creating an accent wall is one of the easiest things you can do that gives huge impact. For the easiest route, go with one single color. I love this bold pink accent wall that SAS Interiors did. I’m also very into bright pinks now. Obviously, a bright pink wall isn’t going to work as an accent wall in many of our bedrooms. However, think bold for your accent wall. You want it to make a statement. The accent wall in my entryway is Rich Navy and it works perfectly for the space. If you want to really step up your accent wall game, you could stencil a design onto your wall. That is exactly what I did in our guest bedroom with this leopard accent wall. The walls were all white with black moldings – it was very stark. With the accent wall, it tied everything together perfectly and added some much needed interest to the walls.

    #2: Do a Mini-Makeover

    14 Real Life Bedroom Ideas Anyone Can Do - a mini-makeover

    Sometimes, we just need a little freshening up. I did a makeover in my master bedroom last year, but a couple months ago, I felt it needed a little something. Instead of doing a full-fledged makeover, I gave it a mini-makeover. I kept most of the main elements of the room, but changed the look with paint and a few other little ideas.

    #3: Get yourself a vanity. 

    Option 1: Build a floating vanity table.

    I did this in my walk-in-closet, but you could do it in your bedroom if you wanted to. I desperately needed a place to sit down and put on my makeup, so I build a simple floating vanity table that even has storage. The tutorial for it is HERE!

    Option 2: Turn an old armoire into a vanity.

    14 Real Life Bedroom Ideas Anyone Can Do - Turn an armoire into a vanity

    If you have enough room in your bedroom, this is a great idea for creating a vanity space. How cool is this old media cabinet turned vanity? I could totally sit there and primp for an hour. Until the kid gets in the way…

    #4: Paint a Headboard on Your Wall

    14 Real Life Bedroom Ideas Anyone Can Do - Paint a headboard on your wall.

    Beds and headboards can be expensive. Hopefully, you can luck up on a good used one that you can makeover or you can DIY your own. You could also just paint a headboard on the wall and call it done. Seriously ya’ll, this headboard is like two lines of paint and one stenciled design. So easy and gorgeous! If you aren’t into painting on a headboard, you can purchase a headboard wall decal. Yes friends, I said a headboard decal – and they look great!

    #5: Decorate your room around your favorite icon

    14 Real Life Bedroom Ideas Anyone Can Do - decorate your bedroom around your favorite icon.

    Most of us all have a favorite icon or celebrity. Hopefully its someone classic like Princess Diana and not Eminem, but hey if Eminem is your idol, who am I to judge? This Audrey Hepburn inspired bedroom is just too adorable. Really, how easy would it be to take your icon and use them as inspiration in your bedroom? Just think about their favorite colors, what movies they’ve been in and pull from that!

    #6: Create a Reading Nook

    14 Real Life Bedroom Ideas Anyone Can Do - create a reading nook!

    I love a good reading nook just about anywhere, but especially in a bedroom. I am one of those people that believe bedrooms should always have at least one chair – and that chair should be perfect for reading in.The reading nook in my bedroom is simply a single chair and side table. You’ll never believe where that chair came from! I am dying over that adorable reading nook for a kiddo from These Moments of Mine. Really, how cute are those curtains? A kid would love hanging out in a place like that, heck I would!

    #7: Make Storage Decorative

    14 Real Life Bedroom Ideas Anyone Can Do - make storage decorative!

    I don’t know about you guys, but there is never enough storage in our bedroom. Half of my clothes are in the guest closet and we are busting out of our dresser and chest of drawers. To save a little closet space, Grunt Labor’s ties are stored outside of the closet. We took an old coke crate and turned it into decorative storage for his ties.I also kinda sorta maybe have a good bit of jewelry. Fake jewelry of course, but there’s a good bit of it. Grunt Labor gave me this bust of David for Christmas (from this Etsy store) that I use to store my necklaces that I wear most often. Its pretty, quirky, and useful.

    #8 – Upholster Your Box Spring

    When it was time for the guest bedroom to get a makeover, I knew I wanted to keep the bed we had in there. The problem was that a bed skirt didn’t hang right on it.

    14 Real Life Bedroom Ideas Anyone Can Do via RainonaTinRoof.com #bedroom #DIY

    I fixed the problem by upholstering the box spring. It was easy to do – no sewing required – and it added some extra color and pattern to the room.

    #9 – Create an Office Space with Skinny Furniture Pieces

    While also plotting out the guest bedroom makeover, I knew I needed to somehow incorporate an office space in there for me. However, the room isn’t large, I needed the office area to take up as little space as possible.

    14 Real Life Bedroom Ideas Anyone Can Do via RainonaTinRoof.com #bedroom #DIYI created the office space by taking an old kitchen table and putting a hutch from a yard sale on top of it to create a desk. There is still ample storage, but it doesn’t take up much space at all.

    #10 – Save Money on Bedding by Buying the Basics

    As we all know, I am cheap. As I said at the beginning of this post, I do not have $1000 to drop on a room, much less on bedding.

    14 Real Life Bedroom Ideas Anyone Can Do via RainonaTinRoof.com #bedroom #DIYOne idea to save on bedding is to buy “basics” and liven them up with pillows and other elements.

    #11 – Create Your Own Art

    In both the guest bedroom and master bedroom, I created my own art.

    14 Real Life Bedroom Ideas Anyone Can Do via RainonaTinRoof.com #bedroom #DIY

    In my master, I made all the animal print wall art using Picmonkey and then found inexpensive frames that I spray painted.

    14 Real Life Bedroom Ideas Anyone Can Do via RainonaTinRoof.com #bedroom #DIY

    In the guest bedroom, I took an old framed print and replaced the prints with this hello darlin’ wall art.

    #12 – Add Drama with Moldings (Real or Fake)

    Moldings add interest to any room, a bedroom is no different.

    14 Real Life Bedroom Ideas Anyone Can Do via RainonaTinRoof.com #bedroom #DIY

    If you are good with wood and have basic DIY skills, you can easily do moldings similar to what Evolution of Style did in her bedroom.

    14 Real Life Bedroom Ideas Anyone Can Do via RainonaTinRoof.com #bedroom #DIY

    If you want to go the cheaper route, you can create faux wall moldings, as I did in my guest bedroom and office space.

    #13 – Keep Bedding Mostly Neutral

    When it comes to bedding, its always smart to keep it mostly neutral.

    14 Real Life Bedroom Ideas Anyone Can Do via RainonaTinRoof.com #bedroom #DIY

    I can easily tire of patterns. That’s why I went with simple white bedding with a pop of coral around the edges on my bed. I can easily change the room color, pillows, throws, etc without having to worry about clashing with lots of other colors or patterns.

    #14 – Keep Existing Furniture and Give It a Simple Makeover

    You don’t have to do extensive paint jobs to give your furniture new life.

    14 Real Life Bedroom Ideas Anyone Can Do via RainonaTinRoof.com #bedroom #DIY

    I am crazy about my dresser and chest of drawers in my bedroom. However, the pulls were definitely lacking some luster. I easily brought them back to life with Rub ‘N Buff.

    What are your go-to bedroom ideas or decorating tips?

    Find more bedroom ideas on my Pinterest board!

    Want more real life decorating ideas? Don’t miss these then…

    10+ Kitchen Ideas for Decorating, Organizing, and Storage – functional ideas for your kitchen that are pretty too!

    20+ Living Room Ideas – real life living room decorating ideas that are actually doable!

    14 Stunning Home Ideas – stunning home ideas that you might not have thought of before!

    You know you don’t wanna miss any of this crazy.

    Sign up to get my posts delivered to your inbox here. 

    Stalk Me Here:

    Pinterest / Facebook / Twitter / Instagram

    Real Life Bedroom Ideas | Bedroom Decor | Bedroom Decorating Ideas | DIY Bedroom Decor | DIY Bedroom Ideas | Bedroom Decor DIY

  • DIY Metal Basket Shelving

    DIY Metal Basket Shelving

    With the new year upon us, it seems that everyone is into organization and storage, myself included. You guys should see the crap I’ve cleaned out of my closets! Since my Coke Crate Tie Organizer was such a big hit, I thought I would update an older post, DIY Metal Basket Shelving.
    DIY Metal Basket Shelving
    Vintage Locker Baskets turned Shelves
    Metal Basket Shelves with Vintage Locker Baskets
    I just mounted (super easy!) old metal baskets to the wall and they became cookbook storage in my kitchen.
    Cheap, easy, functional, and full of character!  Read all about how to do it here.

    You know you don’t wanna miss any of this crazy.

    Sign up to get my posts delivered to your inbox here.

    Stalk Me Here:

    Pinterest / Facebook / Twitter / Instagram

  • Coke Crate Tie Holder

    Coke Crate Tie Holder

    I wanted to share with you guys how we store my husband’s ties.
    It’s very simple, decorative, and creative!
    A Coke crate tie holder!
    Store ties in a vintage coke crate.
    Storing ties in a vintage coke crate.
    I must admit, this was not our idea. A friend of ours uses this method and showed us.
    That Ponder is a genius. But, don’t tell him I said that!
    Coke Crate Tie Holder Storage
    As you can see, he also uses it for his belts.
    Coke Crate Tie Holder
    Coke Crate Tie Storage
    How does your hubby store his ties?
    Need more organizing ideas? 
    This is such an easy organizing idea and it holds family members accountable for their mess! Color Coded Organization
    Ideas & Projects for Organizing Your Home via RainonaTinRoof.com
    Follow along:
  • DIY Metal Basket Shelving (With Old Locker Baskets)

    DIY Metal Basket Shelving (With Old Locker Baskets)

    As most of you know, I have an un-ending love for galvanized metal. This is particularly true of galvanized metal baskets. I especially love those old gym locker baskets. By love, I mean, if I see one for sale, my soul cries out, “You can’t leave it behind. (As long as its a reasonable price.)” I had a few that were sitting on the bottom of my entry table, basically un-used except for decoration. So I took them, turned them on their sides, bolted them to the wall, and they became cookbook holders.
    Metal Basket Shelving from Vintage Locker Baskets
    I heart them. And they were soooo easy to do. All we (ok, Grunt Labor) did was buy really big washers and put them on each side of the basket. (See below.) Make sure the washers are as big or bigger than the holes in the basket. One washer goes on the back of the basket and one on the corresponding front side. A smaller washer goes on top of the larger one in the front and a screw goes through it all. Easy peasy. We also used drywall anchors to make sure the baskets could hold plenty of weight.
    Mounting vintage locker baskets to make shelves.
    Mounting vintage locker baskets to make shelves.
    DIY Metal Basket Shelving
    DIY Metal Basket Shelving
    Metal Basket Shelving
    How to Make Metal Basket Shelving from Vintage Locker Baskets
    Simple, galvanized storage. Ahhh……
    What do you think about my basket shelving?
    Need more organizing & storage ideas? 
    Color Coded Organization  – simple, but effective at keeping the whole family’s clutter contained!
    12 Ideas for Organizing Your Home – great ideas that are doable!
    15 Days to a Clutter-Free Home – banish the clutter in just over two weeks!
    Coke Crate Tie Holder – creative storage for ties!
    You know you don’t wanna miss any of this crazy.

    Sign up to get my posts delivered to your inbox here.

    Stalk Me Here:

    Pinterest / Facebook / Twitter / Instagram
  • DIY Bathroom Shelves: Built In Bathroom Shelves for $25

    DIY Bathroom Shelves: Built In Bathroom Shelves for $25

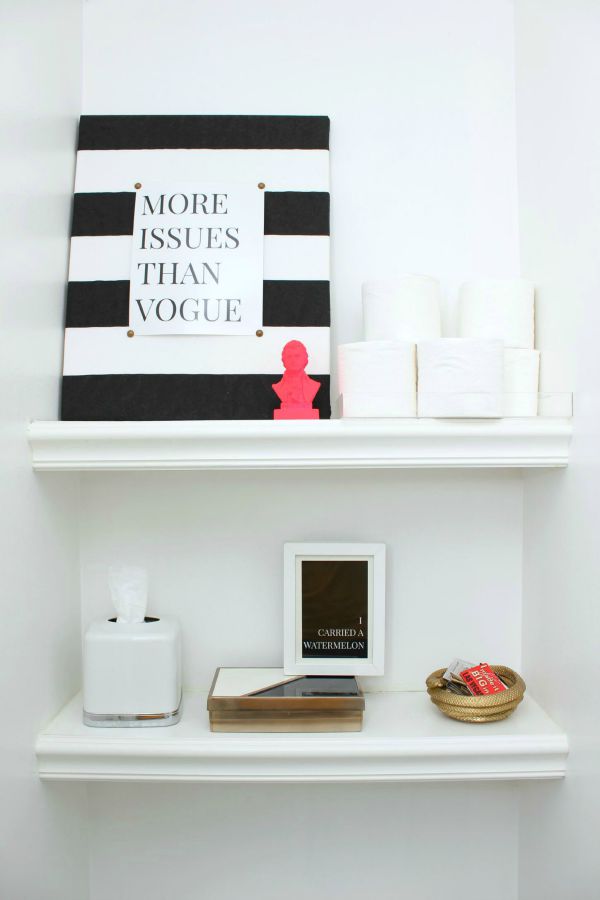
    Everyone can always use a little more storage space, right? These DIY bathroom shelves are a great storage solution for your bathroom! Take advantage of that empty wall behind your toilet and build these bathroom shelves over the toilet for only $25. 

    Who else has one of those wasted spaces above the toilet?

    Ya know, the space where you hang a pretty picture trying to fill the void?

    Who else needs more bathroom storage?

    Who doesn’t?

    Well, I used to have one of those spaces above the toilet….

    and I used to need more bathroom storage……

    But then, Grunt Labor (being the powerful force he is) made these great bathroom shelves above the toilet to fit between the walls.

    DIY Bathroom Shelves Above Toilet

    Built-In Bathroom Shelves

    This post contains affiliate links for your shopping convenience. Click here to read my full disclosure policy.

    Materials and Supplies Needed:

    *Obviously, these shelves will vary in size depending on your space. Therefore, I have made notes as to how much to get in terms of how big your shelves are.1″ x 2″ x 8ft Furring Strips (supports for shelves – get 22 inches of this per shelf )

    • 1″ x 12″ x 10ft Common Boards (actual shelf surface – get pieces as wide as your shelves will be.)
    • Decorative Molding – I used basic chair rail. You’ll need as much of this as each shelf is wide.
    • Stud Finder
    • Nail Gun & Nails or Hammer and Finish Nails
    • Saw (either a miter saw, circular saw or handsaw. I used our miter saw. You could also pre-measure and have the pieces cut at your local home improvement store.)
    • Level
    • Measuring Tape
    • Pencil
    • Paint Color Of Your Choice

    Steps

    Step 1

    Cut two pieces of the furring strips at 11 inches long each.

    Mark your studs on the side walls.

    Using a nail gun or hammer and nails, attach one strip to each side wall where you want a shelf, making sure the strip is level.

    Built In Bathroom Shelves Over Toilet
    Step 2
    Cut your shelf tops, the 1″ x 12″, down to the opening size you have between the two walls or the measurement from edge to edge of the furring strip.
    Place the 1″ x 12″ on top of the furring strips and secure them down with nails.
    Bathroom Shelves Over Toilet

    Step 3

    Cut your molding to the same length as your shelves. Attach it to the front of the shelves using a nail gun or finish nails and a hammer.

    Step 4

    Repeat for as many shelves as you want, then finish with paint.

    Bathroom Shelf Storage Ideas

    It only cost about $25 to make both of these shelves. We did have some scrap wood laying around, but it shouldn’t cost you much more than that. Check the scrap lumber bins at Home Depot and Lowe’s for great deals.

    This open shelving makes great extra storage for toilet paper, decorative items and other bathroom necessities. On top of that, this a great space saver for bathrooms and helps to get things up off the floors!

    See how I built these same shelves, but bigger for storage in my daughter’s playroom HERE!

    Need more bathroom inspiration? You’ll want to see these then…

    Remodeling a Bathroom on a Budget – without compromising on style!

    Classic Blue and White Bathroom Remodel – on a budget!

    1st DIY Bathroom Renovation – on a budget too! This one was even featured in This Old House Magazine!
    2nd Bathroom Makeover – a little preppy, a little old school Hollywood glam!
    Want to come back to this tutorial later? Just pin the image below!
    Bathroom Shelves Above Toilet

    Sign up to get my posts delivered to your inbox here. 

    You know you don’t wanna miss any of this crazy.

    Stalk Me Here:

    Pinterest / Facebook / Twitter / Instagram
    DIY Built In Bathroom Shelves Above Toilet