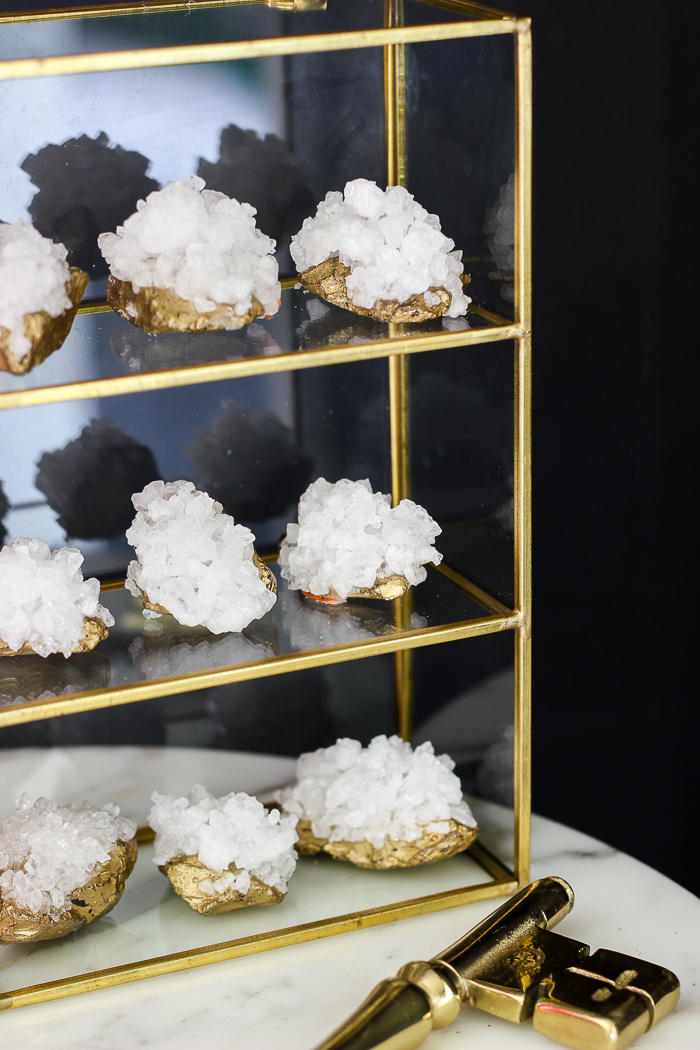
This has been one of those projects I’ve had in the back of my mind for a year.
A freakin’ year.
That’s how long I’ve had the idea and supplies.
And I did try it a year ago, but it didn’t work out the first time around, so I put it to the side. Finally, two weeks ago, I decided to try it a different way and what do you know – it worked like a charm.
While I am for the most part, anti-trends, these pretty crystals and geodes that are all around is one trend I do love.
However, that shit is expensive.
I was at T.J. Maxx yesterday and one single crystal-type bookend cost $25. And that was at T.J.Maxx. And just for one bookend, not two. While $50 for a set of bookends isn’t like highway robbery or anything, I’m used to finding that kind of stuff for $5 – $10 a set at yard sales and thrift shops.
Well with this DIY faux crystal tutorial, you could make your own bookends for way less than $50. You can also use these to adorn many other things, which I will also be showing you tutorials for in the coming weeks. If you love the crystal look, but not the crystal price tag, then today, I am your girl.
DIY Faux Crystals
This post contains affiliate links for your shopping convenience. Click here to read my full disclosure policy.
Tools and Supplies Needed
Steps
This is a simple DIY project, but I thought it would be better explained in a video, rather than pictures. The video below shows you how to make the faux crystals step-by-step and I’m also including written instructions below the video, however there aren’t any photos to go with it.
[adthrive-in-post-video-player video-id=”6KCwDZIN” upload-date=”Tue Feb 28 2017 11:00:00 GMT+0000 (Coordinated Universal Time)” name=”DIY Faux Crystals” description=”How to make faux crystals for home decor projects.”]
Step 1
If your stones aren’t already painted gold, you will first want to paint them using a gold spray paint such as this one. Give them 2-3 coats and let them fully dry overnight before proceeding.
Step 2
Place a good bit of sea salt in a paper plate. Select a stone that has at least one semi-flat side. The side can be sloping, but you don’t want it to have lots of ridges and crannies. Apply E6000 glue to that side and spread it out with a small paintbrush. Press the stone glue side down into the sea salt.
Step 3
Apply a dollop of E6000 glue on top of the sea salt you just put on the stone. Once more, press the stone glue side down into the sea salt.
Step 4
Use your fingers to push any sea salt that is sliding onto the sides of the rock onto the top of the rock. You will also want to come back and do this a few times while the glue is drying as this glue is slippery. Let the stones dry overnight.
Step 5
After the stones have dried, give them three coats of a clear gloss topcoat spray paint. This will provide another bonding agent for the salts and also shine everything up.
You can make these as large or small as you wish, depending on the size of rock you use.
White Bust (similar) / Glass Display Case (similar ones) / Brass Key (similar ones)
You can display them simply in a glass display case or you can create other home decor items out of them as well – see the links below!
Here’s some things you can make with the crystals:
How to Make Faux Crystal Knobs – gorgeous for embellishing side tables and such.
DIY Faux Crystal Vase – easily kick a boring vase up a notch!
How to Make a Crystal Lamp Finial – a great way to add a little glam to a lamp.
How to Make Crystal Magnets – who knew magnets could be so chic?
Other projects you might like to see:
DIY Agate Slice Finials – high-end lamp finials on a beer budget.
DIY Selenite Knobs – another great knob idea for furniture!
Want to remember this post for later? Be sure to pin the image below!