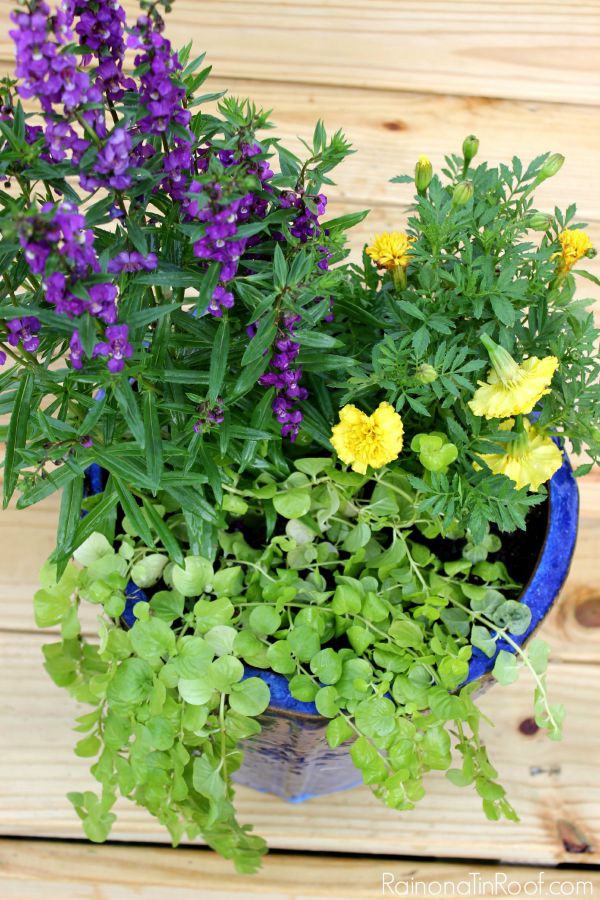
Tag: planter

  • DIY Cedar Planter Box using a Snap Together Frame

    DIY Cedar Planter Box using a Snap Together Frame

    Add some curb appeal to your home with this DIY cedar planter box. These cedar planter box plans use a SnapFence frame that literally snaps together, making this a simple build even for new DIYers. If cedar isn’t your thing, you can easily customize the frame with a different material.

    I am always a sucker for a great planter or flower pot. I couldn’t snatch up a swan planter quick enough at a yard sale the other day even though the guy selling it made sure to point out how badly the paint was chipping. I’ve also been on the lookout for a donkey flower pot ever since I spotted the most adorable one at a yard sale, but sadly they weren’t for sale.

    I also love a great planter box that can pull double duty as an address marker.

    This post is sponsored by SnapFence. All opinions are 100% mine.

    DIY Cedar Planter Box with Shrubs

    Isn’t this one great? This DIY cedar planter was made using SnapFence components, which are rails and connections made of PVC that is built to withstand the elements and make outdoor building projects a whole lot easier.

    Cedar Planter Box DIY

    This post contains affiliate links for your shopping convenience. Click here to read my full disclosure policy.

    For reference, the overall dimensions of my cedar planter box is 24″ high x 18″ deep x 36″ long.

    Materials and Tools Needed: 

    Steps

    Step 1: Assemble the SnapFence frame.

    Cedar Planter Box DIY Frame Materials

    Use the instructions found here to assemble the SnapFence frame for the planter. Working from the bottom up, use a rubber mallet to secure all the rails into the connectors. The video below shows how easy it is to build the frame.

    [adthrive-in-post-video-player video-id=”skCLhoqb” upload-date=”2018-10-02T11:50:16.000Z” name=”DIY Cedar Planter Box using SnapFence” description=”Add some curb appeal to your home with this DIY cedar planter. These cedar planter box plans use a SnapFence frame that literally snaps together, making this a simple build even for new DIYers. If cedar isn’t your thing, you can easily customize the SnapFence frame with a different material.”]

    If you aren’t a video person, then you can use the photos below as a guide.

    Cedar Planter Box Plans - constructing the frame.

    Literally, the instructions lay out exactly how to connect the frame. It took me less than 10 minutes to assemble the frame.

    If you’re curious about how well the rails and connections truly stay snapped together, well I can assure you, they are pretty darn tight. In order for me to get both the video and photos of the process for you, I had to put the frame together, then take it apart and put it together all over again. (Yes, if I were a smart person, I would have stopped to take photos the first time around, but I forgot.) Anywho, I had to really bang on some of the rails and connections with my rubber mallet in order to get the frame broken down. This stuff is very well made and very secure when it’s put together.

    Step 2: Attach the cement board.

    Once you have your frame in place, use the included screws to attach the cement board (concrete board / backer board / whatever you want to call it) to the SnapFence frame.

    DIY Cedar Planter - assembling the side panels.

    Step 3: Finish the Planter Box.

    At this point, you can choose to stucco the planter box, paint it or whatever else your little heart desires. I opted to clad mine with cedar planks.

    You’ll want to start with the short sides of your planter box.

    Place two uncut cedar planks along the bottom of each long side, flush against the cement board.

    Building a cedar planter box.

    Measure the distance between the two planks and cut five cedar planks down to this size. For each cut, use a new cedar picket. Don’t cut again from the same picket. Instead, set these pickets aside and they will be long enough for the long sides of the cedar planter box.

    Lay the planter box on the opposite short side you are working on.

    Applying cedar to a planter box.

    Lay one of your cut cedar planks on the bottom of the short side. You want it to go past the cement board but not extend past the SnapFence PVC feet. Think of the cedar planks as “floating” just above the ground. Make sure there is roughly the same amount of plank hanging over on each side where the long side planks will eventually be placed.

    Put Fuze It on the back of the cedar plank, then clamp into place.

    DIY wooden planter box using cedar.

    Take the rest of your cut exterior wood boards, apply Fuze It to each of those, then line them up and lay them out across the rest of the exposed cement board on this side, pressing each firmly in place as you go.

    Applying cedar boards to the diy planter.

    Once you have them all in place, place a few heavy objects on top to help the glue get a good bond with the cement board.

    Step 4

    After a few hours, repeat Step 3 on the other short side of the cedar planter box.

    Step 5

    After both short sides have been clad with cedar planks, use the same process to cover the long sides of the planter box with cedar. This time when measuring to cut the cedar planks, you’ll just measure from end to end of the cedar boards on either short side, rather than between them.

    DIY Cedar Planter Box with House Numbers

    Attach house numbers to the front of the planter if you wish.

    Place the planter wherever you wish. I think it would look great beside a mailbox, on the front porch or near a garage.

    Related: 10+ Creative Flower Pot Ideas

    Cedar Planter Box DIY with shrubs planted in it.

    Fill with plants and enjoy! I opted to go with tall boxwoods for our planter. With big planter boxes like this, I like to always have something in them that will stay green all year long and then add in annuals as the seasons change. This cedar planter would also be great for planting bulbs in. If you don’t want to fill the entire planter with soil, then fill the bottom of the planter with plastic bottles and jugs to take up space.

    If you want to protect the wood, then apply a coat or two of exterior water seal.

    You can also use Snapfence post ground pilings that can be attached to the bottom connections and anchored into the ground. I opted to forgo those as after I got the entire thing put together it was pretty heavy as is – I couldn’t lift it by myself. I knew that filling it with dirt was only going to make it even heavier and keep it in place, so I didn’t think I needed those.

    I love DIY planter boxes because you can customize them to your home’s exterior. This one is no different. If the cedar look isn’t your thing, you can absolutely go another route! Just think of the SnapFence frame as your blank canvas. 😉 SnapFence also makes lots of other Snap n Build kits like pet enclosures, garden walls, fence kits and more. And yep, you just snap ’em together. 🙂

    What would you cover your planter frame with?

    Want more outdoor project ideas and tips?

    Creating a Cut Flower Garden – perfect for beginners!

    DIY Painted Planter Pots – take basic planters and kick ’em up a notch!

    Want to remember this planter for later? Just pin the image below!

    Cedar Planter Box Plans using a Snap Together Frame
  • Achieving Green Thumb Status

    Achieving Green Thumb Status

    This post is sponsored by Nimbus pot, however all opinions are 100% mine. Affiliate links may be contained in this post. 

    One summer, my great uncle and I got into gardening.

    Ok well, it was more me and he just listened to me rant on about it.

    We visited every Lowe’s, Home Depot, plant nursery and any store basically within an hour of us that was selling plants.

    He bought each of us a rose bush.

    I bought each of us a tropical plant of some sort.

    As if I know the name, I just thought it was pretty.

    The rose bushes lived.

    The tropical plants died.

    As did anything else I purchased. 

    I read his mother’s book on gardening that was thicker than the Bible.

    I’m not kidding. I still have it.

    I attempted to propogate hydrangeas.

    I divided irises.

    I ordered a ridiculous amount of flower seeds from a specialty seed company and planted every last one of them.

    Much to my dismay, not a darn thing lived except for a few irises.

    It was apparent that summer that me and flowers didn’t get along too well.

    When I realized Grunt Labor was such a fantastic gardener, I jumped for joy and didn’t worry with anything flower related again.

    Things have changed though.

    I have now achieved green thumb status, y’all.

    And I didn’t have to lie, cheat or steal to get it.

    Ok, I did cheat a little…

    How I Water My Indoor Plants Only ONCE Every Few Months - And yes, they are thriving! / Nimbus Pot

    Recently, I have a newfound love for indoor plants.

    The problem is that I forget to water them.

    Poor Fiddle Leaf Fig.

    That poor fiddle leaf fig is still recovering from when I forgot to water it for three weeks. The really sad thing is that I was super pumped about getting that plant and then forgot all about it.

    But now, I have a friend who gives me instant green thumb status.

    How I Water My Indoor Plants Only ONCE Every Few Months - And yes, they are thriving! / Nimbus Pot

    The Nimbus Pot.

    Its just like any other flower pot – except its magical.

    Because it waters your plant for you. For up to 4 months.

    All you need to do is plant your plant as you normally would in any planter and water it.

    How I Water My Indoor Plants Only ONCE Every Few Months - And yes, they are thriving! / Nimbus Pot

    P.S. You can use this inside or outside. There’s a specific plug on the bottom for inside or outside.

    Then, remove the handle.

    How I Water My Indoor Plants Only ONCE Every Few Months - And yes, they are thriving! / Nimbus Pot

    Fill the reservoir with water and replace the handle.

    You can also add plant food in the reservoir to help your plants really kick butt and take names. 😉

    How I Water My Indoor Plants Only ONCE Every Few Months - And yes, they are thriving! / Nimbus Pot

    When the cute little blue float drops, you need to add more water.

    So y’all, my plant (as if I actually know the name of it), has been in the Nimbus pot for about a month now. It has done so well – it even had new leaves growing within two weeks of being in the pot.

    I may or may not have done a happy plant dance.

    How I Water My Indoor Plants Only ONCE Every Few Months - And yes, they are thriving! / Nimbus Pot

    I was seriously amazed with my green thumb abilities.

    Ok, the Nimbus’ green thumb abilities.

    You can place the Nimbus pot inside a pretty container if you want to and it won’t affect the watering at all.

    How I Water My Indoor Plants Only ONCE Every Few Months - And yes, they are thriving! / Nimbus Pot

    I have mine inside a thrifted gold container I found. Its actually a little too small at the top for the Nimbus, but not enough to bother me. I think it looks great in front of the confetti wall.

    pin-this-post-2

    How to Grow Indoor Plants | When to Water Plants | Growing Plants Indoors

    Is there anyone else who is ready to achieve instant green thumb status?

    blog-signature-summer-15

    Disclosure: This post was a collaboration with Nimbus Pot. However, all opinions and admittance of lack of watering plants are 100% mine.

    SaveSave

  • Tips and Tricks for The Perfect Container Garden

    Tips and Tricks for The Perfect Container Garden

    This post contains affiliate links. 

    The last time I wrote about gardening or flowers in general, I was apparently misleading.

    You see the post was titled how to get a yard full of hydrangeas, but all I did to get a yard full of beautiful hydrangeas was have a husband who heard me say I’d never leave if I had them.

    So I see where you may have been a bit miffed with me. 

    But it was a good story, no? 

    This time though, I promise, I actually have real tips and tricks for you on how to get those glorious container gardens that we all lust after at the plant nurseries.

    Tips & Tricks for the Perfect Container Garden

    Tips & Tricks for the Perfect Container Garden

    *Husband and child not required for this, but helpful.

    First, let’s talk about what you need to start with:

    Tips & Tricks for the Perfect Container Garden

    First, you want to fill your planter about halfway up with soil.
    Tips & Tricks for the Perfect Container Garden

    Next, start adding in your plants. Start with the tall plant. Break up the roots some and place it toward the back of your planter.

    Tips & Tricks for the Perfect Container Garden

    Place your other plants toward the front while creating a triangle with all the plants.

    Then, fill the planter up with more soil as needed.

    Tips & Tricks for the Perfect Container Garden

    Now, water, water, water!

    Tips & Tricks for the Perfect Container Garden

    And feed, feed, feed!

    You can’t skimp on the watering and feeding. Its important to keep feeding and watering throughout the summer to get and keep those big, beautiful blooms longer.

    Plus, y’all its just really hot right now.

    I think us and the plants could use a little extra food and water, no?

    Tips & Tricks for the Perfect Container Garden

    The MiracleGro LiquaFeed System is what we use since its so easy to feed the plants while watering. Just hook the system up to your spigot, turn it to feed and you’re in business. The food comes right out through the hose with the water.

    Tips & Tricks for the Perfect Container Garden

    My last tip for container gardens…

    Tips & Tricks for the Perfect Container Garden

    Try to keep the marigold blooms away from the three year old who wants to squeeze them to pieces.

    Do you have any container gardening tips?

    If you liked this, you’re probably going to want to see this…

    This is so fun and quirky! Super affordable too! DIY Flamingo Sprinkler

    DIY Flamingo Sprinkler

    pin-this-post-2

    How to Plant a Container Garden | How to Make Flowers Last Longer | How to Make Flowers Live Longer | Tips for Growing Flowers

    You know you don’t wanna miss any of this crazy.

    Sign up to get my posts delivered to your inbox here.

    Stalk Me Here:

    Bloglovin / Pinterest / Facebook / Twitter / Google+ / Instagram

    blog-signature-summer-15

    If it waters, now it feeds with Miracle-Gro® LiquaFeed® Universal Feeder. It’s a great tool to help you reach your gardening goals by providing the essential nutrients your plants need to thrive all season long.

    This is a sponsored conversation written by me on behalf of Miracle-Gro. The opinions and text are all mine.

    SaveSaveSaveSave

  • DIY Succulent Book Planter

    DIY Succulent Book Planter

    I may be giving myself too much credit.

    My head may be getting a bit too big.

    But….

    I’m giving succulents a try again.

    With the success (meaning I’ve had it for more than a month and haven’t killed it yet) of the fiddle leaf fig and the banana tree, I’m thinking, hoping, praying that I can keep these succulents alive.

    In the past year, I’ve successfully killed two succulents.

    Yes, I’m well aware I’m the only person on the planet who can’t keep them alive.

    I decided that maybe if I gave this new succulent a cozy, happy, pretty home it would want to live longer, so I made it a succulent book planter.

    What better place for a succulent to live than in between the pages of a book?

    Heck, what better place for anyone to live than in between the pages of a book?

    DIY Succulent Book Planter via RainonaTinRoof.com #succulent #ad

    I was selected for this opportunity as a member of Clever Girls Collective and the content and opinions expressed here are all my own.

    DIY Succulent Book Planter

    Before I tell you how to make this little project, let me answer your question that I know you are asking, “Aren’t the pages going to get moldy and mildewy from the plant’s moisture?”

    Why no, they are not. We are going to seal the pages.

    Materials Needed:

    DIY Succulent Book Planter via RainonaTinRoof.com #succulent #ad

    • Small Potted Succulent
    • Plastic tray to go around base of the succulent pot
    • Books that you don’t care to cut
    • Dremel Micro 8050
    • Pencil
    • Mod Podge
    • Paint Brush

    Steps

    Step 1

    Determine the order you want to stack your books in. Take the book that will be on top and lay the plastic tray in the center of it and trace around it.

    Step 2

    Put the cutting disc on the Dremel Micro 8050, and begin cutting through the cover of the book. I put the Dremel on the highest speed to do all my cutting. The Micro 8050 is pretty cool because it can cut, carve, engrave, sand, grind, sharpen, clean and polish—helping you bring just about any brilliant project to life. It’s also cordless – which means no worrying about accidentally cutting through cords – not that I’ve ever done that before or anything…

    DIY Succulent Book Planter via RainonaTinRoof.com #succulent #ad

    Step 3

    Once you get through the front cover of the book, open it up and continue cutting through the pages.

    Step 4

    Once you get all the way through your book, your circle may be a bit smaller on the back than the front. Flip the book over to the back and cut the circle as needed. You can go up and down with the Dremel to get a good even cut. It is very light and easy to handle in tight spaces, the Dremel® Micro™8050 is packed with features that have crafters, hobbyists and DIYers in mind: soft grip, LED front-end lighting to illuminate projects, a docking station that continually charges, and an 8V Max Lithium-ion battery.

    Step 5

    After your top book has its circle cut out, place your succulent pot in the book to make sure it will fit properly. If it doesn’t cut more as needed. If its good to go, move on to cutting the second book. Do this by placing the book you have already cut on top of the book you are about to cut. Use a pencil and trace inside the circle onto the book to be cut.

    Step 6 

    Remove the top book and place the plastic tray around the traced circle. Trace around the plastic tray – it may be slightly bigger and you want that measurement, not the smaller one.

    DIY Succulent Book Planter via RainonaTinRoof.com #succulent #ad

    Step 7

    Begin cutting out the hole in the second book as you did with the first book.

    Step 8

    If your pot was the same size as mine, you may not need to go all the way through the back cover on the second book, test the pot in the book as you go to determine how much more you need to cut. If your pot is narrower at the base, as most are, it will be ok if the hole in the second book is a bit angled as you see above. Just test the pot to see if it fits.

    Step 9

    After all the cutting is done, clean off the books and shake out any pieces of cut paper. To seal the books and keep mildew and mold from forming, you need to apply Mod Podge to the cut edges of the books. I started at the back cover and worked my way through the book. You don’t have to go through every single page, do small sections of pages at a time and you can put it on heavy.

    Step 10

    On the inside covers of the books, apply Mod Podge all over the cover and pages to keep the book shut.

    DIY Succulent Book Planter via RainonaTinRoof.com #succulent #ad

    Step 11

    If you want to, you can seal the outer edges of the book with Mod Podge as well.

    Step 12

    To hold the books together, apply Mod Podge to the covers of the books and place them in the order you want them stacked. Also, be sure to give the top book cover a really good coat of Mod Podge.

    Step 13

    After the Mod Podge has dried, place your plastic tray in the books and then your potted succulent plant.

    DIY Succulent Book Planter via RainonaTinRoof.com #succulent #ad

    Isn’t this a fun twist on a planter?

    The Dremel made the process of cutting out the pages go so fast and even I was able to cut out a decent circle.

    DIY Succulent Book Planter via RainonaTinRoof.com #succulent #ad

    I’m even liking it more than I expected.

    You can purchase the Dremel Micro 8050 online at Amazon.com and HomeDepot.com.

    Want more great planter ideas? 

    DIY Cedar Planter Box – a great DIY project that will add some curb appeal to your home!

    Modern Painted Planter Pots – take basic planters and snaz them up with spray paint!

    10+ Creative Flower Pot Ideas – full of so many out-of-the-box ideas!

    You know you don’t wanna miss any of this crazy.

    Sign up to get my posts delivered to your inbox here. 

    Stalk Me Here:

    Pinterest / Facebook / Twitter /Instagram

  • Teapot Planter

    Teapot Planter

    I was hoping all my fun planters would be ready for some beauty shots by now, but they are not except for this one. And its my favorite anyway.

    Teapot Planter: Flower Pot made out of an old Teapot
    Its an old metal teapot planter. The best thing about it? I scoured it up from my Pap’s old toolshed. He used to keep random nuts, bolts, etc. in it. The flowers in this pot always do so well every year. (more…)