Tag: gardening

  • Plant these flowers to get bountiful bouquets from your cutting garden this summer.

    Plant these flowers to get bountiful bouquets from your cutting garden this summer.

    There’s just something about fresh cut flowers, isn’t there? I love having my own cut flower garden to pull flowers from during the summer. Below, you’ll find my list of the best cut flowers to grow in your own cutting garden. You’ll be overflowing with gorgeous bouquets all summer!

    ‘Tis the season for getting those cutting gardens started!

    Our garden is prepped and just waiting on seeds to be planted. We’ve started some seeds already in containers, but it’s supposed to get cold here again this week, so I’ve held off on getting them in the ground. I’m not too worried about it though. I didn’t get anything in the ground until May last year and still had plenty of beautiful flowers. When will you be planting your seeds and flowers where you’re at?

    My cut flower garden is like therapy for me. It’s hard work – especially in the beginning, but getting out there and working in the soil, planting flowers, pulling weeds and watching it all come to life really helps to calm my soul. It’s something I do for me. There were a few years when I said I just didn’t have time to do the garden. Well a couple years back, I decided I was going to make time for it once more and let me just tell you, I didn’t realize how much I missed it and how much it helped me mentally. It’s a really great escape.

    I’m certainly not a master gardener. I learn more every year and am constantly referring to a 900 page gardening book from the 1960s that my great uncle handed down to me. I have found quite a few “surefire” cut flowers though – ones that have grown well for me and are easy to start out with if you’re new to this cutting garden thing.

    Best Cut Flowers - Teddy Bear Sunflowers

    This post contains affiliate links for your shopping convenience. Click here to read my full disclosure policy.

    Best Flowers for Cutting Garden

    I’m going to break this down into two different types of cutting garden flowers: annuals and perennials. You’ll have to plant annuals every year, but perennials will come back each year.

    Like I said, these are flowers I’ve grown myself and had success with. There are many more varieties of cut flowers, but I wouldn’t feel comfortable suggesting them to you if I haven’t had success with them myself. That being said, if you’ve had success with other types of cut flowers, please do leave them in the comments for the rest of us to give a try!

    And if you’re new to growing a cutting garden, then here’s my cut flower garden guide for beginners.

    Best Annual Flowers for Cutting

    Best Flowers for Cutting Garden - Zinnias

    Zinnias

    You can never ever ever go wrong with Zinnias. Not only are zinnias, in my opinion, one of the prettiest annual flowers that are out there, they are one of the easiest to grow and provide blooms all summer long. A few of my personal favorite varieties of Zinnias include:

    • Big Red – gorgeous deep red blooms with a long vase life.

    • Envy – lime green blossoms that are perfect for bright colorful, summer arrangement.

    • Cut and Come Again Mix – these are exactly what their name implies! The more you cut them, the more they come back with more blooms.

    • Purple Prince – these purple flowers are another favorite of mine. It pairs nicely with the envy zinnias as well.

    Growing from seed is easy with Zinnias. They can be started early indoors or planted right into the ground after the danger of the last frost. I’ve had success both ways.

    Sunflowers

    Best Annual Flowers for Cutting - Sunflowers

    Sunflowers are another foolproof cut flower. There are the huge varieties, which are great for photo backdrops, but my favorites for cutting are:

    • Sunflower Busy Bee – traditional look sunflowers, but not the super tall ones. These get about 3′ – 4′ feet tall.

    • Teddy Bear Sunflowers – I planted these for the first time last year and am completely hooked now. These double flowering sunflowers have a cushion like look and are gorgeous. The first picture in this post is of a teddy bear sunflower.

    Amaranthus

    I planted Amaranthus seeds for the first time last year after having gotten a few in a wildflower packet of seeds and loved them. I love the weeping, drapey look these add to arrangements. I’ve planted two different colors of these beauties:

    • Love Lies Bleeding – a gorgeous deep garnet color.

    • Green – this light green hue is the perfect compliment to brightly colored flowers.

    Best Cut Flowers to Grow in Your Cutting Garden - fresh cut flower arrangement.

    Gomphrena

    I planted these sweet little flowers for the first time last year and I adore them. They are great filler flowers for larger or medium sized arrangements, but also look precious solo. These get about 24 – 30 inches tall.

    • QIS Mix – this is the mix of Gomphrena I planted last year and had great success with. I’m planning to give this Strawberry Fields and Fireworks variety a whirl this year too. They look too pretty not to!

    Gerbera Daisies

    Best Cut Flowers for a Cut Flower Garden - Gerbera Daisies

    I won’t lie, these can be difficult to get going. But if you live in the south and can get these to take root, then they can actually become perennials. That’s how I had success with mine. I didn’t get many blooms that first summer, but the following one, it wasn’t too bad! I’ve found it’s best to buy these as plants instead of seeds. These flowers have long stems as well. A couple of my favorites are Gerbera Glow and these with pink petals and yellow centers, which I like to call Pink Lemonade.

    Best Perennial Flowers for Cutting

    Perennial flowers will come back year after year and tend to get bigger and bigger each year. Here are few of my favorites.

    Best Perennial Flowers for Cutting - Hydrangea

    Hydrangeas

    I absolutely adore hydrangeas. They are my favorite flower and Grunt even planted a whole row of them for me at one of our houses. There are loads of different hydrangea varieties to choose from here.

    Gladiolus

    These are bulbs that you can plant in the spring and bloom in the summer. There is a taller variety and a shorter one:

    • Fordhook Ruffled Pastel Mix – these are the taller variety and the ones that have done extremely well for me in my garden.

    • Butterfly – these are a shorter variety of Glads. My mother-in-law planted some of these last year and they are beautiful.

    Rudbeckia (Black Eyed Susans)

    You’ve really got to love these flowers to plant them. Because once you do, they will just multiply over and over every year. Of course, you can always pull up the flowers from anywhere that you don’t want them. They are very drought tolerant as well and easy to grow. Find them here.

    Echinacea (Coneflowers)

    Coneflowers are similar to Black Eyed Susans in that they will multiply year after year. I prefer Coneflowers to Black Eyed Susans. As these grow over the years, you can also divide them and plant in other places as well. I’ve had great success with this Deep Rose variety.

    Don’t forget – share your suggestions for good cutting flowers in the comments!

    Looking for more ways to get “growing” outside? Take a look at these:

    Cedar Planter Box – DIY this planter and add house numbers to it for killer curb appeal!

    DIY Flamingo Sprinkler – who knew watering the garden could look so cool?

    Flower Pot Ideas – Out-of-the-box creative ideas for planting flowers.

    Want to remember this list of flowers for later? Just pin the image below!

    Best Flowers for a Cutting Garden - zinnias, sunflowers, hydrangeas, black eyed susan, amaranthus, and more.

    Follow along on social to watch our garden grow this year:

    Facebook | Instagram | Pinterest | Twitter

  • 5 Tips for Beautiful Planters All Summer Long

    5 Tips for Beautiful Planters All Summer Long

    Disclosure: This post is sponsored by Proven Winners, however all opinions and flower pot mishaps are 100% mine. 

    A few weeks ago, I was perusing the Home Depot completely unaware of the valuable life lesson that was about to play out before my very eyes.

    The Circus and I had a slew of errands to run before her birthday party that was in just a few days and picking up spray paint at the Home Depot was one of those things on the list. Prior to leaving the house that morning, I had actually showered, washed my hair and even applied a little makeup.

    I was on top of my game.

    This was a Friday and by washing my hair that morning, I was good to go for another few days sans hair washing.

    You know you hate washing your hair everyday too. Just own it already. 

    After we picked up our spray paint, the Circus and I decided to take a quick peek at the planters in the garden center. I had been on the hunt for some new ones to flank either side of our front door.

    I spied some nice, classic large cream planters on a shelf a tad higher than myself. They were stacked upside down on top of one another and as I reached up to tilt them down and pull them off the shelf, I thought nothing about the fact that it had rained earlier this morning.

    I thought nothing about that fact until the water which had collected on the bottom side of the planters hit me right on top of the head and totally ruined my freshly washed and styled hair.

    I looked at the Circus, not knowing whether I wanted to laugh or cry and trying hard to keep the long list of expletives from emerging out of my mouth. She didn’t know what to say either, but after about 10 seconds of just staring at me with her mouth slightly open, she finally said, “You look funny, Mama.”

    So we just went with it. For the rest of the day, we completed our errands – gross hair and all.

    And yes, we bought the planters.

    Tips for Beautiful Planters All Summer Long

    So besides sharing life lessons learned at the Home Depot, I also thought that today I would share some easy tips for beautiful planters all summer long.

    Something great needs to come out of water on my freshly washed hair, right?

    5 Tips for Beautiful Planters All Summer Long

    Tip #1

    Drill drainage holes in the bottom of your planters if they don’t already have them.

    Tips for Beautiful Planters All Summer Long - be sure to drill drainage holes in the bottom of your planters if they aren't there already.

    Do not skip this, y’all! Lots of planters already come with predrilled drainage holes, but some don’t. The planters I bought had places to drill out the holes, but they weren’t pre-drilled out. To drill the drainage holes, just put a drill bit on your drill and put a few holes in the bottom of the planter. If the excess water can’t drain from the planter, your flowers aren’t going to make it.

    Tip #2

    If I would have filled these planters completely with soil, there’s no telling how much money I would have spent just in soil! To reduce the amount of soil you need, use fillers in the bottom of your planter pots.

    Tips for Beautiful Planters All Summer Long - fill the bottom of your planters with plastic bottles to help drainage and reduce the amount of soil you need.

    For these planters, I used an old plastic pot that came from another plant and then used plastic bottles around that pot. I probably came about 1/3 – halfway up with the filler in these pots. I left plenty of room for dirt and the roots of the flowers to grow.

    Tip #3

    Choose the right annuals for your space.

    Tips for Beautiful Planters All Summer Long - choose annuals that are proven to perform well.

    Planting flowers that will perform well in your area as well as in the space you are planting them is crucial to getting and keeping beautiful planters all summer long.

    These planters are on our front porch, which faces west and is in full sun pretty much all day. We have zero shade in the front of our house and we live in Tennessee, so it gets pretty darn hot around here in the summer. For this reason, we needed flowers that were very heat tolerant and liked the sun.

    Tips for Beautiful Planters All Summer Long

    We went with Angelface Perfectly Pink Angelonia, Indigo Charm Petunia, and Sweet Caroline Bewitched After Midnight Ipomoea all from the Proven Winners line of annuals.

    Besides being flowers that will perform well on our front porch, this combination of flowers also goes along with the filler, spiller and thriller approach to container gardening – to really make a planter pop, you want one flower in it that fills, one that spills and one that thrills. A thriller plant is going to add height to your planter; for me, these were the Angelface Perfectly Pink Angelonias. The filler is going to help your planter look more full and will usually be more of a mounded flower – like the petunia. The spiller is going to be a plant that is literally going to spill over and hang over the edge of your planter – like the sweet potato vine.

    Tip #4

    Now you’ve got the perfect flowers and you just need to arrange them.

    Tips for Beautiful Planters All Summer Long - arrange the annuals correctly.

    You want to put your thriller (the taller one) in the back of the planter and then your filler and spillers side-by-side in the front of your planter.

    Tips for Beautiful Planters All Summer Long

    After you plant your flowers, give them a good drink of water.

    Tip #5

    Don’t forget to water and feed throughout the summer!

    Annuals aren’t plant ’em and forget ’em flowers. At a minimum, they need to be watered regularly, but if you really want to knock your planters out of the park, then feed them on a regular basis with good plant food. So that I don’t forget to water and feed my planters this year, right after planting them, I put a daily reminder in my phone to water them and then at around the three week mark, I put a reminder in to feed them weekly. Now, if your planters aren’t under cover like mine are, then if it rains, you don’t have to worry about watering them as often.

    Tips for Beautiful Planters All Summer Long

    I can’t wait to see how gorgeous these planters get this summer!

    You can find great container recipe ideas from Proven Winners here – they do all the work for you and tell you exactly what works well together! You can also snag a free copy of their Gardener’s Idea Book here and they have a slew of gardening ideas and tips on their Proven Beauty website.

    Happy Planter Season!

    You might also want to see…

    DIY Cedar Planter Box  – using a simple snap-together frame!

    10+ Flower Pot Ideas – unique ideas for beautiful flower pots!

    Pin This Post

    Take the guesswork out of container gardening with these easy tips for beautiful planters all summer long - anyone can do this!

  • Snazzy Painted Planter Pots

    Snazzy Painted Planter Pots

    I am willing spring to come with this project. Willing the cold cold cold air of yesterday to go away and the warmth that we enjoyed just on Monday to return. Living in the Tennessee valley, you literally never know what the weather may bring.

    And now, I just realized I sound like an old man talking about the weather.

    Let’s move on to the snazzy painted planter pots, shall we?

    I actually made these toward the end of last summer. Thus why, when you see the images, it’s all bright and sunny. However, when I went to post them, the weather had quickly changed and I decided it would be best to wait – so here they are now, getting thrown into internet land along with a little wish for spring.

    Instead of paying $50 on a planter pot, buy a cheap one and dress it up with spray paint! Easy Painted Planter Pots | Gardening | Fiddle Leaf Fig | Geometric | Painting Patterns

    Snazzy Painted Planter Pots

    Affiliate links may be contained in this post.

    Materials & Supplies Needed:

    Step 1: 

    To make the planter that has vertical triangles that meet in the middle, start by creating the pattern below with the smaller width FrogTape®.

    Instead of paying $50 on a planter pot, buy a cheap one and dress it up with spray paint! Easy Painted Planter Pots | Gardening | Fiddle Leaf Fig | Geometric | Painting Patterns

    I didn’t really measure on these much, just eyeballed it.

    Step 2: 

    Next, you will want to use your craft knife to trim up all the edges of the tape.

    Instead of paying $50 on a planter pot, buy a cheap one and dress it up with spray paint! Easy Painted Planter Pots | Gardening | Fiddle Leaf Fig | Geometric | Painting Patterns

    For the largest triangle, you will want to cut out the section where the triangles meet as shown below.

    Instead of paying $50 on a planter pot, buy a cheap one and dress it up with spray paint! Easy Painted Planter Pots | Gardening | Fiddle Leaf Fig | Geometric | Painting Patterns

    Step 3: 

    Begin creating the same pattern as you did at the top, except on the bottom of the pot now.

    Instead of paying $50 on a planter pot, buy a cheap one and dress it up with spray paint! Easy Painted Planter Pots | Gardening | Fiddle Leaf Fig | Geometric | Painting Patterns

    Step 4: 

    After you have created the pattern, tape off the surrounding area of the planter with the larger width FrogTape®.

    Instead of paying $50 on a planter pot, buy a cheap one and dress it up with spray paint! Easy Painted Planter Pots | Gardening | Fiddle Leaf Fig | Geometric | Painting Patterns

    Use your fingernail to firmly adhere the FrogTape® edges to the planter.

    Step 5:

    For the other planter, simply place six strips of the 0.94″ FrogTape® on the side of the planter in triangle formations as shown below.

    Instead of paying $50 on a planter pot, buy a cheap one and dress it up with spray paint! Easy Painted Planter Pots | Gardening | Fiddle Leaf Fig | Geometric | Painting Patterns

    Step 6: 

    Even up your edges with a craft knife and tape off the rest of the planter with the 1.88″ FrogTape®.

    Instead of paying $50 on a planter pot, buy a cheap one and dress it up with spray paint! Easy Painted Planter Pots | Gardening | Fiddle Leaf Fig | Geometric | Painting Patterns

    Step 7: 

    Use your fingernail to firmly apply pressure to all the edges of the FrogTape® to create a good seal.

    Instead of paying $50 on a planter pot, buy a cheap one and dress it up with spray paint! Easy Painted Planter Pots | Gardening | Fiddle Leaf Fig | Geometric | Painting Patterns

    Step 8: 

    Spray paint your designs.

    Step 9: 

    After your last coat of spray paint (I did two coats), immediately remove the FrogTape®.

    Let the planters fully dry, then fill them with your favorite plants.

    Instead of paying $50 on a planter pot, buy a cheap one and dress it up with spray paint! Easy Painted Planter Pots | Gardening | Fiddle Leaf Fig | Geometric | Painting Patterns

    Instead of paying $50 on a planter pot, buy a cheap one and dress it up with spray paint! Easy Painted Planter Pots | Gardening | Fiddle Leaf Fig | Geometric | Painting Patterns

    Instead of paying $50 on a planter pot, buy a cheap one and dress it up with spray paint! Easy Painted Planter Pots | Gardening | Fiddle Leaf Fig | Geometric | Painting Patterns

    Instead of paying $50 a pop, you’ve spent about $15 per planter.

    Not too shabby.

    Now, come on spring!!

    Do you have any great pattern ideas for planters? 


    You might also wanna check out…

    DIY Cedar Planter Box  – using a simple snap-together frame!

    Tips & Tricks for the Perfect Container Garden

    Teapot Planter – turn an old teapot into an adorable planter!

    My Green Thumb Trick

    pin-this-post-2

    DIY Painted Planter Pots | Flower Pot Ideas | Flower Pot Crafts | DIY Flower Pots | Planter Ideas | DIY Planter Ideas | DIY Planter Pots

    blog-signature-summer-15

    frogtape-disclosure

  • Achieving Green Thumb Status

    Achieving Green Thumb Status

    This post is sponsored by Nimbus pot, however all opinions are 100% mine. Affiliate links may be contained in this post. 

    One summer, my great uncle and I got into gardening.

    Ok well, it was more me and he just listened to me rant on about it.

    We visited every Lowe’s, Home Depot, plant nursery and any store basically within an hour of us that was selling plants.

    He bought each of us a rose bush.

    I bought each of us a tropical plant of some sort.

    As if I know the name, I just thought it was pretty.

    The rose bushes lived.

    The tropical plants died.

    As did anything else I purchased. 

    I read his mother’s book on gardening that was thicker than the Bible.

    I’m not kidding. I still have it.

    I attempted to propogate hydrangeas.

    I divided irises.

    I ordered a ridiculous amount of flower seeds from a specialty seed company and planted every last one of them.

    Much to my dismay, not a darn thing lived except for a few irises.

    It was apparent that summer that me and flowers didn’t get along too well.

    When I realized Grunt Labor was such a fantastic gardener, I jumped for joy and didn’t worry with anything flower related again.

    Things have changed though.

    I have now achieved green thumb status, y’all.

    And I didn’t have to lie, cheat or steal to get it.

    Ok, I did cheat a little…

    How I Water My Indoor Plants Only ONCE Every Few Months - And yes, they are thriving! / Nimbus Pot

    Recently, I have a newfound love for indoor plants.

    The problem is that I forget to water them.

    Poor Fiddle Leaf Fig.

    That poor fiddle leaf fig is still recovering from when I forgot to water it for three weeks. The really sad thing is that I was super pumped about getting that plant and then forgot all about it.

    But now, I have a friend who gives me instant green thumb status.

    How I Water My Indoor Plants Only ONCE Every Few Months - And yes, they are thriving! / Nimbus Pot

    The Nimbus Pot.

    Its just like any other flower pot – except its magical.

    Because it waters your plant for you. For up to 4 months.

    All you need to do is plant your plant as you normally would in any planter and water it.

    How I Water My Indoor Plants Only ONCE Every Few Months - And yes, they are thriving! / Nimbus Pot

    P.S. You can use this inside or outside. There’s a specific plug on the bottom for inside or outside.

    Then, remove the handle.

    How I Water My Indoor Plants Only ONCE Every Few Months - And yes, they are thriving! / Nimbus Pot

    Fill the reservoir with water and replace the handle.

    You can also add plant food in the reservoir to help your plants really kick butt and take names. 😉

    How I Water My Indoor Plants Only ONCE Every Few Months - And yes, they are thriving! / Nimbus Pot

    When the cute little blue float drops, you need to add more water.

    So y’all, my plant (as if I actually know the name of it), has been in the Nimbus pot for about a month now. It has done so well – it even had new leaves growing within two weeks of being in the pot.

    I may or may not have done a happy plant dance.

    How I Water My Indoor Plants Only ONCE Every Few Months - And yes, they are thriving! / Nimbus Pot

    I was seriously amazed with my green thumb abilities.

    Ok, the Nimbus’ green thumb abilities.

    You can place the Nimbus pot inside a pretty container if you want to and it won’t affect the watering at all.

    How I Water My Indoor Plants Only ONCE Every Few Months - And yes, they are thriving! / Nimbus Pot

    I have mine inside a thrifted gold container I found. Its actually a little too small at the top for the Nimbus, but not enough to bother me. I think it looks great in front of the confetti wall.

    pin-this-post-2

    How to Grow Indoor Plants | When to Water Plants | Growing Plants Indoors

    Is there anyone else who is ready to achieve instant green thumb status?

    blog-signature-summer-15

    Disclosure: This post was a collaboration with Nimbus Pot. However, all opinions and admittance of lack of watering plants are 100% mine.

    SaveSave

  • Tips and Tricks for The Perfect Container Garden

    Tips and Tricks for The Perfect Container Garden

    This post contains affiliate links. 

    The last time I wrote about gardening or flowers in general, I was apparently misleading.

    You see the post was titled how to get a yard full of hydrangeas, but all I did to get a yard full of beautiful hydrangeas was have a husband who heard me say I’d never leave if I had them.

    So I see where you may have been a bit miffed with me. 

    But it was a good story, no? 

    This time though, I promise, I actually have real tips and tricks for you on how to get those glorious container gardens that we all lust after at the plant nurseries.

    Tips & Tricks for the Perfect Container Garden

    Tips & Tricks for the Perfect Container Garden

    *Husband and child not required for this, but helpful.

    First, let’s talk about what you need to start with:

    Tips & Tricks for the Perfect Container Garden

    First, you want to fill your planter about halfway up with soil.
    Tips & Tricks for the Perfect Container Garden

    Next, start adding in your plants. Start with the tall plant. Break up the roots some and place it toward the back of your planter.

    Tips & Tricks for the Perfect Container Garden

    Place your other plants toward the front while creating a triangle with all the plants.

    Then, fill the planter up with more soil as needed.

    Tips & Tricks for the Perfect Container Garden

    Now, water, water, water!

    Tips & Tricks for the Perfect Container Garden

    And feed, feed, feed!

    You can’t skimp on the watering and feeding. Its important to keep feeding and watering throughout the summer to get and keep those big, beautiful blooms longer.

    Plus, y’all its just really hot right now.

    I think us and the plants could use a little extra food and water, no?

    Tips & Tricks for the Perfect Container Garden

    The MiracleGro LiquaFeed System is what we use since its so easy to feed the plants while watering. Just hook the system up to your spigot, turn it to feed and you’re in business. The food comes right out through the hose with the water.

    Tips & Tricks for the Perfect Container Garden

    My last tip for container gardens…

    Tips & Tricks for the Perfect Container Garden

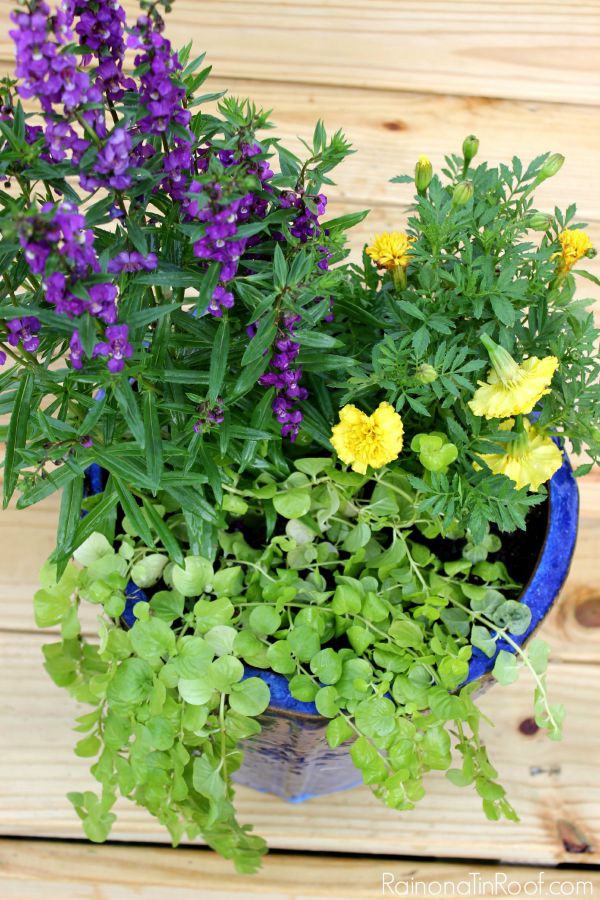
    Try to keep the marigold blooms away from the three year old who wants to squeeze them to pieces.

    Do you have any container gardening tips?

    If you liked this, you’re probably going to want to see this…

    This is so fun and quirky! Super affordable too! DIY Flamingo Sprinkler

    DIY Flamingo Sprinkler

    pin-this-post-2

    How to Plant a Container Garden | How to Make Flowers Last Longer | How to Make Flowers Live Longer | Tips for Growing Flowers

    You know you don’t wanna miss any of this crazy.

    Sign up to get my posts delivered to your inbox here.

    Stalk Me Here:

    Bloglovin / Pinterest / Facebook / Twitter / Google+ / Instagram

    blog-signature-summer-15

    If it waters, now it feeds with Miracle-Gro® LiquaFeed® Universal Feeder. It’s a great tool to help you reach your gardening goals by providing the essential nutrients your plants need to thrive all season long.

    This is a sponsored conversation written by me on behalf of Miracle-Gro. The opinions and text are all mine.

    SaveSaveSaveSave

  • 13 Stunning Home Ideas I Found in One Place

    13 Stunning Home Ideas I Found in One Place

    Last Wednesday they let me into the Nashville Symphony Show House.

    Nashville Symphony House

    Builder, Castle Homes; Architect, Wade Weissman

    I know. Its gorgeous. Go ahead and take a minute to close your gaping mouth.

    I’m quite certain the powers that be must have never read my blog before to know that this gal is borderline redneck and hadn’t set foot in such a fancy house before – otherwise they may have thought twice before sending my invitation.

    I walked out of that house scolding myself for using inappropriate language in front of people who never met me before, but brimming over with DIY and decorating ideas.

    I quickly got over the inappropriate language scolding. I feel overall they became better people for having met me.

    The ideas though – my head is still spinning. Here’s 14 stunning home ideas that I took away from the Nashville Symphony Show House – and really, there were waaaay more than 14, but I felt I should cut it off somewhere instead of keeping you stuck here reading all day.

    1. Create an entryway nook to your bedroom.

    Have an entryway to your bedroom.

    Design by Julie Couch Interiors

    Obviously, we won’t all have the space for this, but I fell in love with this little entry of sorts that was carved out of the master bedroom.

    2. Always, always, always go for lots of windows in the bathroom.

    Opt for lots of windows in the bathroom.

    Design by Julie Couch Interiors

    Now, if you live in a neighborhood where you can open a window and toss a muffin to your next door neighbor, you’ll also want to invest in some window shades, as your neighbor doesn’t want to see your rear end.

    3. And hang your mirrors from the ceiling.

    Hang your mirrors from the ceiling instead of the wall.

    Design by Julie Couch Interiors

    I had never ever ever seen this idea before, but I thought it was genius – hang your mirrors from the ceiling!

    4. Go for a window in the shower too.

    Add a window in the shower.

    Design by Julie Couch Interiors

    Its much easier to wake up with a pretty view as you shower.

    5. Add “drooping” greenery to your floral arrangements. 

    Leafy Greens and Pink Flowers

    Design by Julie Couch Interiors

    I don’t know about you, but it seems I’m always wanting the leaves on my flowers to stand up right alongside the actual flower. I was smitten with this arrangement though that has “drooping” greenery.

    6. Clad a bookshelf – front, back, and sides – in barn wood.

    Cover a bookshelf in barn wood or pallet wood.

    Design by Julie Couch Interiors

    These bookshelves were built-ins, but I think you could easily re-create the look with regular bookshelves by just gluing on barn wood or pallet wood.

    7. Turn a vintage dough bowl into a succulent garden. 

    Plant a succulent garden in a dough bowl.

    Design by Castle Homes

    I’m not 100% sure that is a vintage dough bowl, in fact I don’t think it is, but it very much looks like one. Just make sure your bowl is lined very well to prevent water damage.

    8. Feathers are always right. 

    Feather Pillow

    Design by Rozanne Jackson Interiors for The Iron Gate

    There’s a good chance I left drool on this pillow. I’m already plotting out my own DIY version.

    9. Opt for the really tall lamp.

    Opt for the really tall lamp.

    Design by Rozanne Jackson Interiors for The Iron Gate

    I love the sophisticated lamp paired with the rustic-industrial nightstand.

    10. Always have at least one old piece in every room.
    Have something old in every room, like an antique mirror.

    Design by Rozanne Jackson Interiors for The Iron Gate

    Like this mirror. Just gorgeous.

    11. Use a vintage showcase as bedroom storage. 

    Use a vintage showcase in a bedroom for storage.

    Design by Rozanne Jackson Interiors for The Iron Gate

    This could very well be my favorite idea from the house. In one bedroom, there was an old showcase from a store that held records and such. I am crazy over this idea. 

    12. Go for the chimney that touches the sky.

    Go for the chimney that touches the sky.

    Design by Mark Simmons Interiors

    One day, when I save enough money from buying cheap beer, I’ll have a chimney that touches the sky.

    13. Remember the 3 T’s when it comes to container gardens. 

    Carmen Johnston Container Gardening

    Container Gardens by Carmen Johnston Gardens

    Something tall, something thick, and something trailing – all planted in a triangle.

    See what I mean? Stellar home ideas.

    Looking for more great home decor ideas…

    20+ Living Room Ideas – gorgeous, livable spaces!

    How to Coordinate Paint Colors in Your House – one little tip that will save your sanity!

    14 Real Life Bedroom Ideas – ideas that are both functional and pretty.

    You know you don’t wanna miss any of this crazy.

    Sign up to get my posts delivered to your inbox here.

    Stalk Me Here:

    Pinterest / Facebook / Twitter / Instagram

    pin-this-post

    Drop. Dead. Gorgeous! Stunning Home Ideas!

  • Teapot Planter

    Teapot Planter

    I was hoping all my fun planters would be ready for some beauty shots by now, but they are not except for this one. And its my favorite anyway.

    Teapot Planter: Flower Pot made out of an old Teapot
    Its an old metal teapot planter. The best thing about it? I scoured it up from my Pap’s old toolshed. He used to keep random nuts, bolts, etc. in it. The flowers in this pot always do so well every year. (more…)